Links
Overview
The magic of the internet lies entirely in its ability to make connections. To build a webpage and publish it online means that that content can be viewed by just about anyone, anywhere, at anytime. By the simple act of putting up a webpage, you’ve just created the potential to connect millions of people with the content you just shared, and that in itself is pretty darn cool.
Now multiply that by the internet’s ability to create connections between bits of content. By simply clicking a link in a webpage, you can be immediately transported to another page with new, but related content, you can instantly download a pdf document, or have your email client launch to reach out to a company you’ve been working with. Another important use of links is having meaningful page navigation allowing your users to move between pages on your own website.
In this lesson, we’ll learn how to link our webpage to someone else’s, how to link to downloadable files and documents, and how to link our individual pages together. These will be the basic building blocks for building a site navigation, a topic we’ll pick up on in a later lesson.
Lesson Setup
Let’s get started in our usual fashion by creating the folders and files we’ll need for our lesson.
- Create a new Lesson05 folder inside of Bob
- Create two subfolders: notes and root
- Inside the root folder, create an images folder
- Download the lesson 5 resources from here.
- Move those images (and pdf document) into your images folder for this lesson
- Open up TextMate
- File > New to open a new file
- Code in your boilerplate HTML making sure to add a title to the page. I’m calling mine: The Art of Linking.
- Save your HTML file to your Lesson05 root folder with the name: lesson05.html
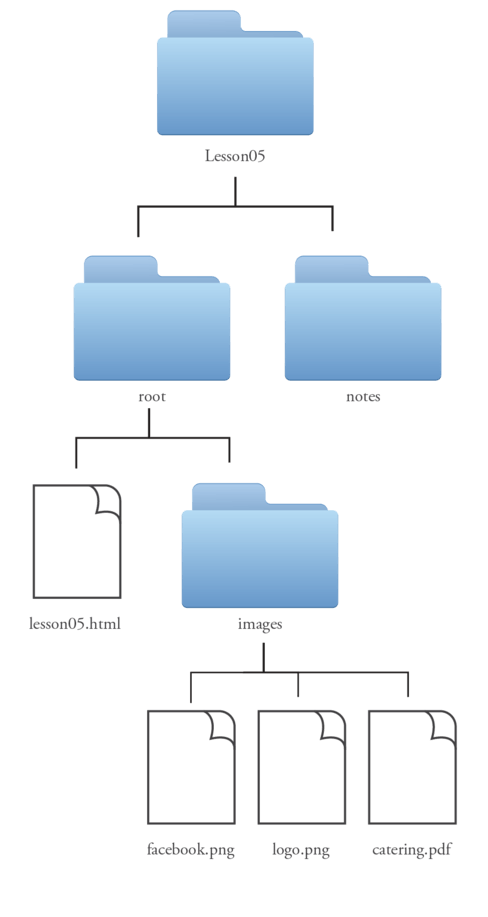
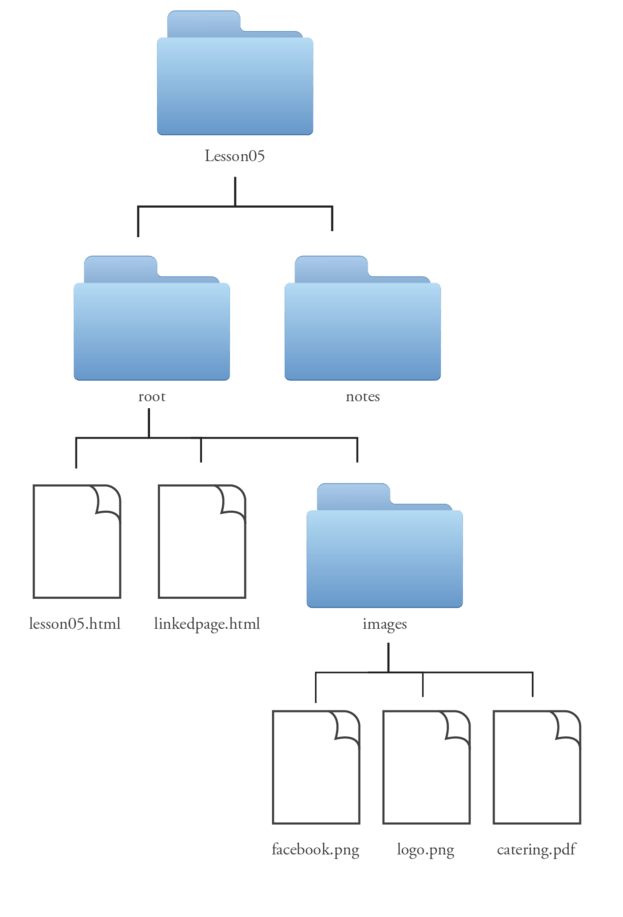
Your file and folder structure should look like (fig. 1)
Your HTML should look something like this:
<!doctype html>
<html>
  <head>
    <title>The Art of Linking</title>
  </head>

  <body>


  </body>

</html>
- Launch your web browser
- Open your lesson05.html file
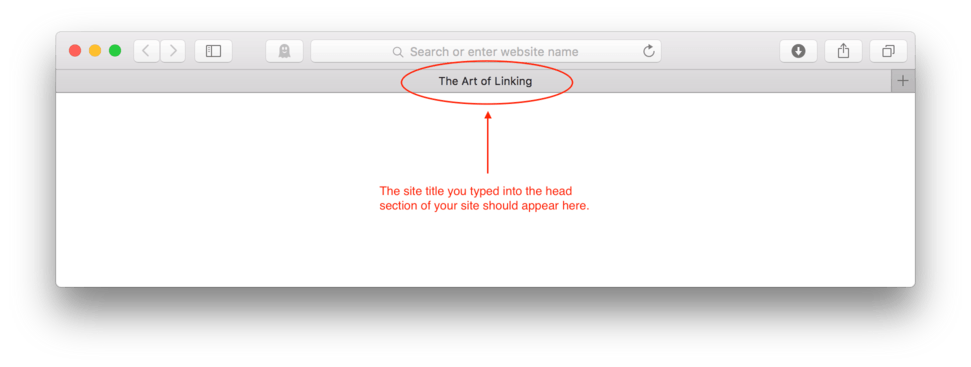
Here’s about how it should look in your browser. (fig. 2)
Note: You may have noticed that I’ve shortened the lesson setup to a list of action steps above. If you need a refresher on folder and file organization see the lesson 3 setup section.
Writing Links
As a reminder, we should always have an h1 on our page that describes the page content. I’m going to go ahead and reuse my page title as it seems like a good description of what my page is about.
<!doctype html>
<html>
  <head>
    <title>The Art of Linking</title>
  </head>

  <body>
    <h1>The Art of Linking</h1>

  </body>

</html>
And then, a good rule of thumb is to add a paragraph to describe our page in a little more detail.
<h1>The Art of Linking</h1>
<p>Links are the clickable parts of any website. They are used to connect different content. They can take you to another page in your site, to another website entirely, or even allow you to send an email or download a file.</p>
Remember every paragraph needs a <p> and </p> tag, but make sure only paragraphs use <p></p> tags, be semantic.
HTML links always begin with an opening link tag written, <a>. You might be surprised to see the lowercase “a” rather than the word “link” in-between the brackets, but HTML doesn’t think of a link like we do. Instead the browser thinks of links as anchors that directly connect to or “reference” something else. Therefore, the “a” stands for “anchor” in the HTML.
Links (or anchors, as we just learned) are similar to images in that they need to give the browser directions. They need to tell the browser where to go when the link is clicked. So, like in the <img /> tag, we need to add an attribute to the <a>. Instead of using src= like we do with images, we need to learn a new attribute. Links use an attribute called “hypertext reference” written href=.
The href= attribute is very similar to the src= attribute in that it is giving the browser specific directions on where to find something. We give those directions in the exact same way we do for images. We need to start our directions at the exact spot in the HTML file where the code for the link lives and begin directing from there.
Let’s add a link below our paragraph. The HTML code for a link begins like this:
<a href=
Then, just like an image, we begin the address with a double quotation mark.
<a href="
Next, we give the address to whatever we want to link to. Let’s make our first link take us to the Google homepage. To do this, we need the entire url including the http://www. part. I usually copy and paste this directly from the address bar in my browser to make sure I’ve got the whole thing.
<a href="http://www.google.com
Now we need to make sure to add a double quotation mark to the end of the address to mark it complete and then add a right angle bracket, >, to close the opening link tag.
<a href="http://www.google.com">
Still with me? Good deal, let’s keep going.
Now we need to have something on the screen that we press to activate the link. The simplest thing to use is text. So, after the opening link tag, you put whatever you want the link to say. So, let’s say, “Google!”
<a href=”http://www.google.com">Google!
Perfect. Now we end the link tag with a closing link tag, </a>.
<a href="http://www.google.com">Google!</a>
Here is my HTML so far so you can double-check your work:
<!doctype html>
<html>
	<head>
		<title>The Art of Linking</title>
	</head>

	<body>
		<h1>The Art of Linking</h1>
		<p>Links are the clickable parts of any website. They are used to connect different content. They can take you to another page in your site, to another website entirely, or even allow you to send an email or download a file.</p>
		<a href="http://www.google.com">Google!</a>

	</body>

</html>
Cool? OK, good.
Now lets Save our HTML file and test in our browser. Make sure to Refresh.
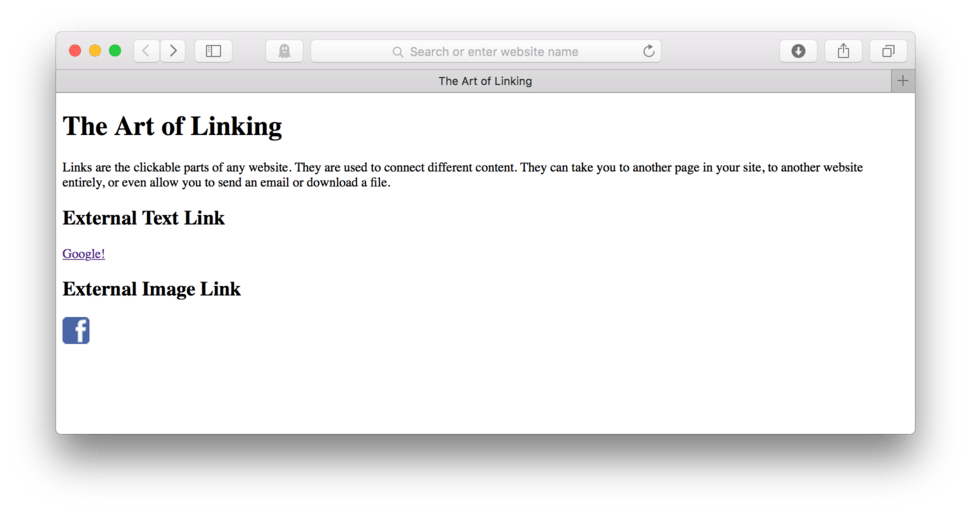
Here’s how it looks in my browser. (fig. 3)
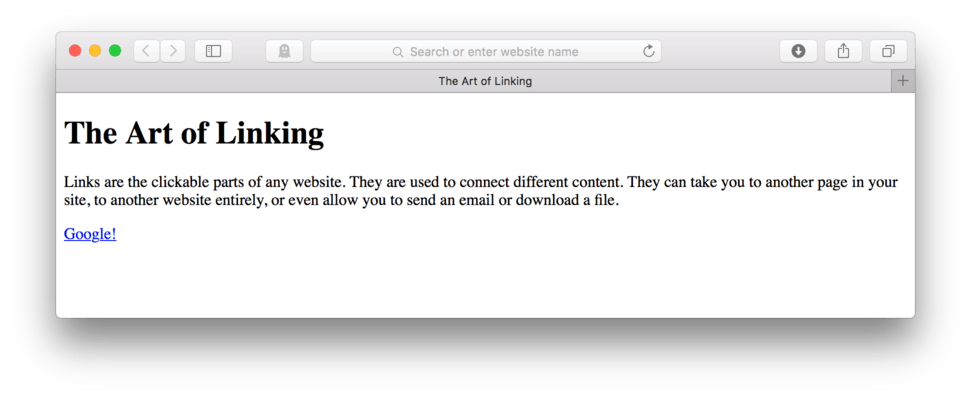
See the blue underlined text? That is the HTML default way of saying, “This is a link, click it!”
Go ahead and click on the link. It should take you to Google’s homepage. (fig. 4)
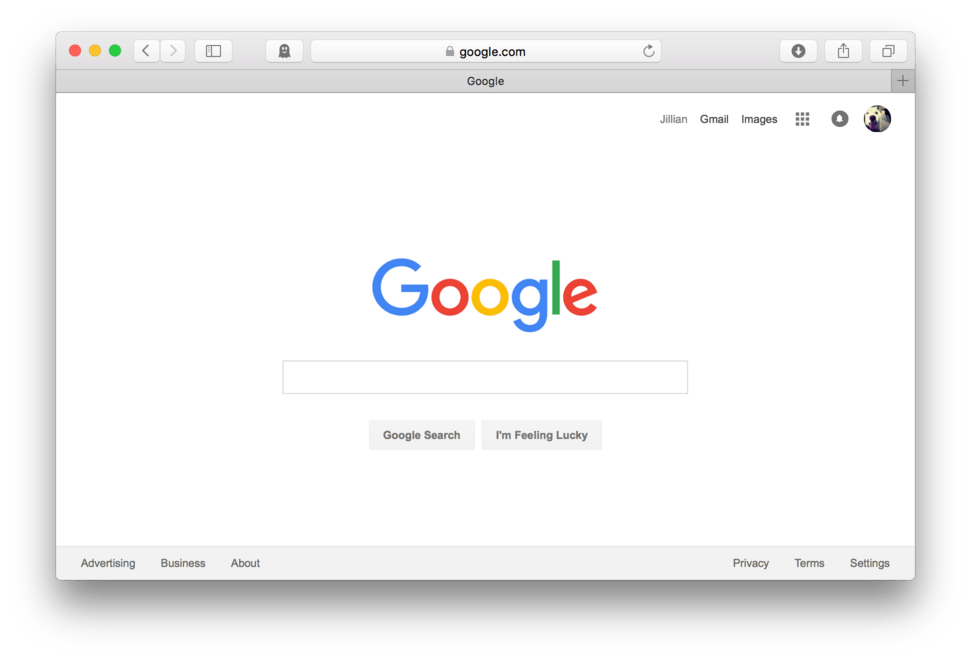
You’ll notice that your page has now been replaced by the Google homepage. In order to get back to your page, you’ll need to use the back button in the browser. You can also reopen the file. We’ll discuss other options for handling this a little later in the lesson.
Text Links vs. Image Links
Now that we’ve learned the basics about writing HTML links, let’s talk about their appearance on the screen a bit more. There are basically two different ways to mark up a link: as text or as an image.
Text Links
If you look closely at the code we used for the link to Google, you’ll see that the text that appears between the <a></a> tags is just some text. This is what we call a text link. It simply means that the link will appear on screen as clickable text. In the example below, I’ve typed: “Text Link”. This text becomes the clickable link, and as we found out with our Google example, it appears by default in the browser as underlined blue text like (fig. 5).

Note: You’ll notice that if you mouse over the link text, the cursor changes from the typical black arrow to a hand with the pointer finger, giving your user another hint that the link is clickable.
Image Links
There are cases where you’ll prefer to use an image (think button) rather than text for the link. Luckily, for us we already know enough about displaying images to make this happen. All that we need to do is replace the text between the <a></a> tags with an <img /> tag, pointing to an image in our images folder, like this:
<a href="http://www.facebook.com"><img src="images/facebook.png" /></a>
Some people like to use enters and tabs to nest the <img /> tag inside the <a></a> tags to make the code easier to read like this:
<a href="http://www.facebook.com">
	<img src="images/facebook.png">
</a>
In an image link, we simply see whatever image we pointed to show up on the page as a clickable link. Here’s a commonly seen example, the Facebook logo, as the image link:

Note: You’ll notice the same pointing hand appear when mouse over the image link, again helping the user to know that the image is clickable.
Types of Links
Now that we taken some time to learn about both text and image links, it’s worth talking a little about the types of things we can link to.
The major code difference is what is included inside the quotation marks on the href= attribute. Let’s take a look at the different types of links and the code differences associated with each.
External Links
External links are links that connect us to a webpage outside of our own website or root folder. We created an external link earlier in this lesson when we connected our link to Google. Since Google is a website that is outside of our own website, it’s considered “external” to our site.
External links require that we type in the entire url (web address) including the http://www. into the href= attribute like this:
<a href="http://www.google.com">Google!</a>
another example of a commonly seen external link would be a link to Facebook. Facebook links are often images using the Facebook icon rather than text, so they use an image link like this:
<a href="http://www.facebook.com">
	<img src="images/facebook.png" />
</a>
Now that we’ve learned about external text links and external image links, let’s update our lesson05.html file adding more information and make sure we have examples of both.
- Make room above the link to Google we created earlier to add an
<h2> - Let’s add a descriptive label:
<h2>External Text Link</h2> - Now, move the cursor to the empty line below the Google link.
- Let’s add another label:
<h2>External Image Link</h2> - Ok, now we’ll code in our Facebook link. We have an image ready to go in our images folder for this, it’s titled: “facebook.png”.
<a href="http://www.facebook.com"><img src="images/facebook.png" /></a>
Your HTML should now look something like this:
<!doctype html>
<html>
	<head>
		<title>The Art of Linking</title>
	</head>

	<body>
		<h1>The Art of Linking</h1>
		<p>Links are the clickable parts of any website. They are used to connect different content. They can take you to another page in your site, to another website entirely, or even allow you to send an email or download a file.</p>

		<h2>External Text Link</h2>
		<a href="http://www.google.com">Google!</a>

		<h2>External Image Link</h2>
		<a href="http://www.facebook.com">
			<img src="images/facebook.png" />
		</a>

	</body>

</html>
Note: I’ve added some extra white space between my headings to make the code easier for me to read. Feel free to do the same
Save your file and Refresh in your browser. Your page should now look something like this: (fig. 6)
Internal Links
An internal link connects our user with content that lives on the same website or in the same root folder as the page or content it’s linking to. Internal links help us navigate sites by connecting pages within a single website. They can also connect us with content higher or lower on a single webpage, or in other cases connect us to downloadable content like, for example, a PDF file.
Internal links do not require that we type in the entire url (web address) into the href= attribute. Instead, internal links use the same sort of addresses that our images do. They give directions from the HTML file to other files that are either next to or inside a folder near the starting point.
In other words, internal links do not have to go out into the internet to find out content. Instead they only have to look inside the root folder to find the linked content or file.
In order to do this topic justice, we’ll need to create another HTML file inside our lesson05 root folder to connect our internal link to.
- In TextMate, File > New to create the new file.
- Type in the HTML boilerplate, just like any other page.
- For the page title, let’s type in:
Linked Page - Let’s add an h1. I’m going to just keep it simple and type:
<h1>Linked Page</h1> - Save this file in the Lesson05 root folder. Let’s name it: “linkedpage.html”
Your lesson05 folder structure should now look like this: (fig. 7)
See how lesson04.html and linkedpage.html are neighbors? This makes it easy to write directions for the browser to find it if we want to link to our new page.
First, let’s create our link. We’ll use a simple text link here.
- In your lesson05.html file, move to the next empty line following your External Link examples.
- Let’s add an h2 heading to identify this new example:
<h2>Internal Text Link</h2> - Now, hit Enter to move to the next line
- Here, we’ll code in our link. Since these two pages are neighbors inside our our root folder, all we need to do is type the name of the file in the
href=attribute and add the text we’d like to use for the link text. Let’s type in:Linked Pagehere like this:html <a href="linkedpage.html">Linked Page</a> - Save your file and Refresh in your browser.
Here’s how your HTML should look:
	<body>
		<h1>The Art of Linking</h1>
		<p>Links are the clickable parts of any website. They are used to connect different content. They can take you to another page in your site, to another website entirely, or even allow you to send an email or download a file.</p>

		<h2>External Text Link</h2>
		<a href="http://www.google.com">Google!</a>

		<h2>External Image Link</h2>
		<a href="http://www.facebook.com">
			<img src="images/facebook.png" />
		</a>

		<h2>Internal Text Link</h2>
		<a href="linkedpage.html">Linked Page</a>

		...
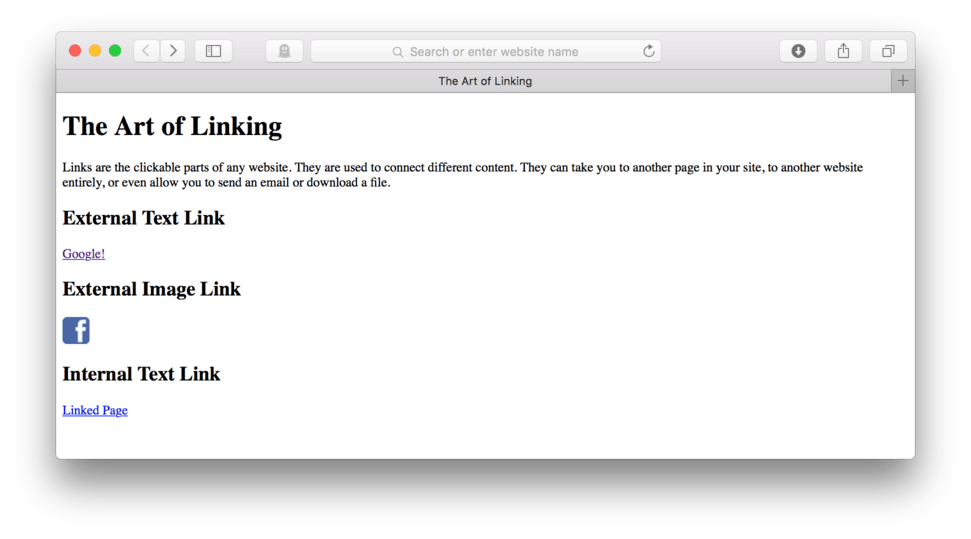
If everything went according to plan, your site should now look like (fig. 8).
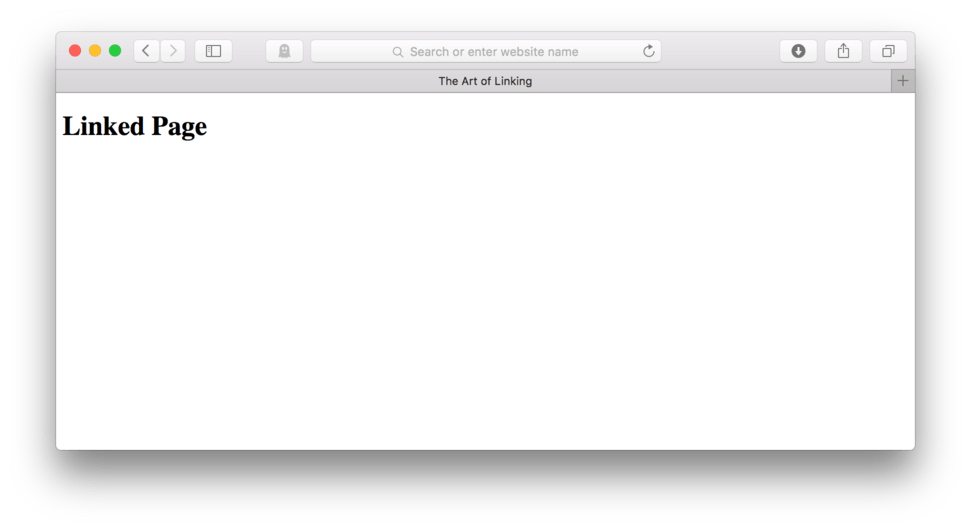
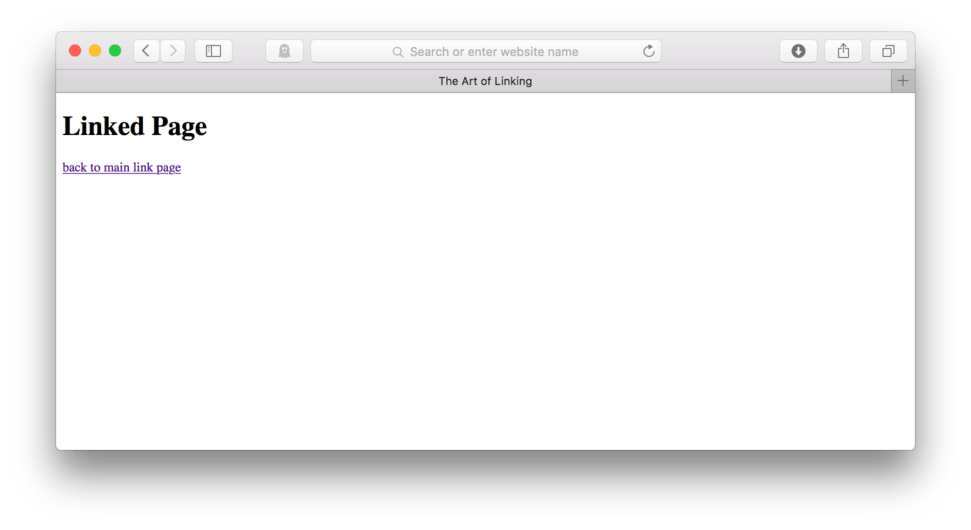
As we expected, the link shows up as blue underlined text. If we click it, we should be taken to our newly created page, linkedpage.html, which should look like (fig. 9)
Did that work? Awesome, you did it. You just successfully created your first internal link! Good job. If it didn’t work, go back and first double-check that you didn’t misspell anything in your code!
Now that we’ve made our first successful internal link, let’s try it again. We’ll create a link on our linkedpage.html taking us back to our lesson05.html.
- Find your TextMate window for linkedpage.html
- After the h2, hit Enter to move to the next line
- Create a text link using the text “
return to main link page” for the link text. - Save, Refresh, and Test to make sure the new link does take you back to your other page.
Here’s the HTML I used on linkedpage.html to accomplish this:
<!doctype html>
<html>
	<head>
		<title>Linked Page</title>
	</head>

	<body>
		<h1>Linked Page</h1>
		<a href="lesson05.html">back to main link page<a>

	</body>

</html>
and here’s how it looks in the browser. (fig. 10)
If all went according to plan, clicking the “back to main link page” link should have taken us back to the lesson05.html page we began at the start of this lesson.
You might have already noticed, but there is something different about the way our links look on this page now.
Do you see it? The links are no longer blue, they have turned purple. This is the browser’s way of letting you know that you’ve already clicked on a particular link, referred to as a “visited link”. It’s actually pretty a pretty convenient feature. (fig. 11)
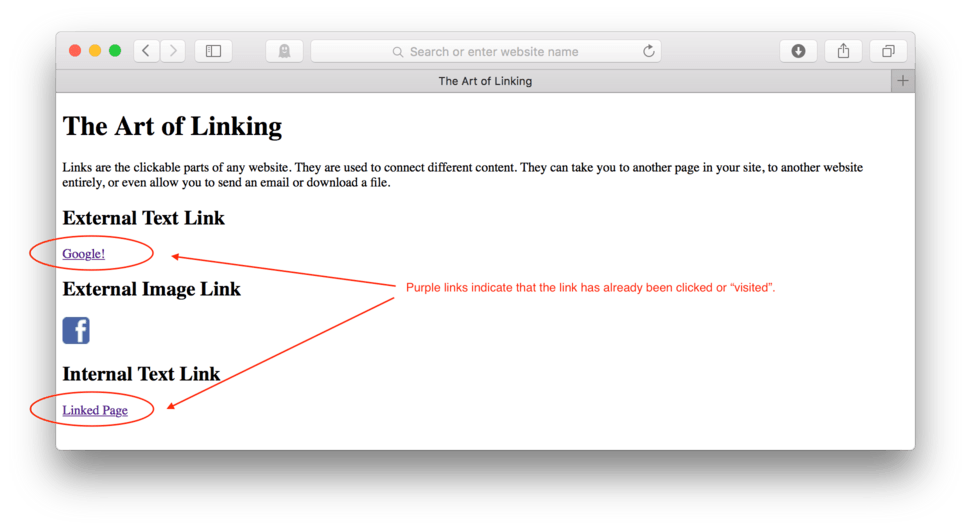
Note: This visited status purple stuff only happens on text links, image links don’t have a visited status by default.
Internal text links are the most common links you’ll find in a website. These are used 99% of the time for the primary navigation that shows up on the top or left of most websites. More to come on site navigation, I promise.
Next up, we’ll create an internal image link. You may have gone with me on the previous example where we made a text link that said “back to main link page” without thinking too much about whether or not that would really be the best way to connect back to a page. If you did, that’s ok, you were probably just focused on learning about linking structures.
But, now that we’re talking about it, I wanted to mention that there is a pretty common way to link back to the homepage of a website- we click on the logo.
The logo is a great candidate for an image link back to the homepage because it’s become second nature for people to do so. I think it makes sense in our example too. Unfortunately, this website doesn’t have a logo of its own. That’s ok. For the sake of demonstration, we can borrow the logo from Cookies Inc. which should already be in your images folder. Let’s go ahead and add a internal image link using the logo.png file living inside your images file. Put this link directly after the <body> tag so it appears at the very top of the page like this:
<!doctype html>
<html>
	<head>
		<title>Linked Page</title>
	</head>

	<body>
		<a href="lesson05.html"><img src="images/logo.png" /><a>
		<h1>Linked Page</h1>
		<a href="lesson05.html">back to main link page<a>
	</body>

</html>
Save your HTML file and Refresh linkedpage.html in your browser.
It should now look something like (fig. 12).
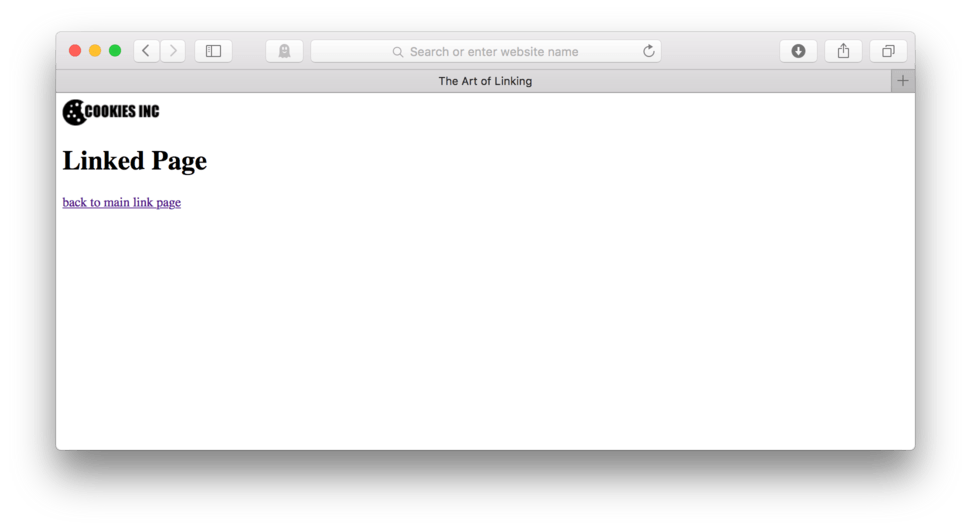
If our link is correctly coded, we should see the black arrow icon turn to a hand with an extended pointer finger when we hover over the logo image and if we click it, we should land ourselves back on our lesson05.html page.
Internal Asset Links
There is another kind of internal link. Instead of connecting just pages together, we can also connect to other types of content like a PDF document. We see this often when we visit sites that have manuals, or forms we need to download to view.
These too are just simple internal links. They can be either text or image links. The only thing that we really need to pay attention to when linking to content like a PDF document is that the document actually lives inside our root folder and that we know exactly where it lives so we can give accurate directions.
It is perfectly acceptable to have files like PDF documents live inside your images folder, though some people like to create another folder entirely if they have a number of these type of documents included in their site. We should already have a PDF file available to use in our images folder, “catering.pdf” so let’s go ahead and use that for our next example.
- In our lesson05.html file, we’ll add a new h2:
<h2>Internal PDF Link</h2> - Hit Enter to move to the next line
- Let’s add a new internal link using the text:
Catering Form. This form is a PDF file named catering.pdf and lives in your images folder:<a href="images/catering.pdf">Catering Form</a> - Save your file and Refresh your browser
The HTML should now look like this:
<!doctype html>
<html>
<head>
<title>The Art of Linking</title>
</head>
<body>
<h1>The Art of Linking</h1>
<p>Links are the clickable parts of any website. They are used to connect different content. They can take you to another page in your site, to another website entirely, or even allow you to send an email or download a file.</p>
<h2>External Text Link</h2>
<a href="http://www.google.com">Google!</a>
<h2>External Image Link</h2>
<a href="http://www.facebook.com">
<img src="images/facebook.png" />
</a>
<h2>Internal Text Link</h2>
<a href="linkedpage.html">Linked Page</a>
<h2>Internal PDF Link</h2>
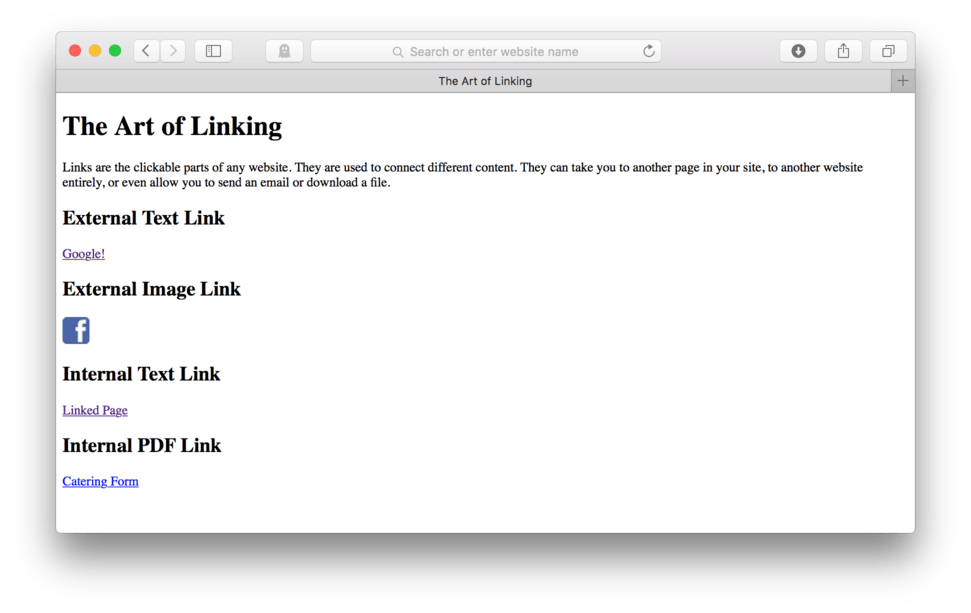
<a href="images/catering.pdf">Catering Form</a>
</body>
</html>
and your browser should look like (fig. 13).
Note: We could have just as easily used an image for this by putting and image tag between the
<a></a>tags.
If you click the new Catering Form link, one of two things should have happened. Depending on your browser and it’s settings, you either were taken to a new page that had your PDF file viewable inside of it, or the PDF file began downloading to your computer.
Safari usually opens the PDF file inside the browser window. You can easily print the PDF from the Safari navigation by using File > Print or download it using the built in navigation you see by hovering over the bottom of the browser window (fig. 14)

That’s it. Now you know how to link to files that live inside your root folder. Remember it’s just like directing the browser to an image, just make sure to let the browser know in the href= where exactly your file lives.
The Target Attribute
No matter what type of link you are creating: external, internal, PDF, or whatever, you’ve probably noticed that those links have opened up in the same browser window as the page that contained the link. This is the natural behavior of the web. New things will automatically replace the old things and that is mostly OK.
There will be times where we would prefer that the link opened up in a brand new browser window or tab. This is often the case when we take our site visitor to somebody else’s webpage. We do want them to have access to the content over there, but we hate to have them lose track of our page. In these cases, we can tell the browser to open the link (file or page) in a brand new tab or browser window using a new attribute tag, target=.
As I already mentioned, the default behavior of a browser is to open any link inside the same browser window, effectively “replacing” the old content with the new linked content. This is mostly cool, but in those times where we want our new content to open in a new window or tab, we can add target="_blank" to tell the browser to open our new content in a new place.
For example, if we wanted our Catering Form to open in a brand new browser, our new HTML would look like this:
<a href="images/catering.pdf" target="_blank">Catering Form</a>
The "_blank" portion of that code instructs the browser to use a new tab or window. There are other options to put in there, but for now at least, this is the most commonly seen one.
Note: Notice that the
target="_blank"appears in the code following the completedhref=attribute. This is typically how the code would be written but order doesn’t actually matter in this case. Either one could appear first as long as both are completed each with their own sets of double quotation marks.
Let’s make sure to practice this technique a bit by doing some examples in our lesson05.html file.
- Find your lesson05.html file
- Let’s add
<h2>External Text Link in New Tab/Browser</h2> - On the next line, type:
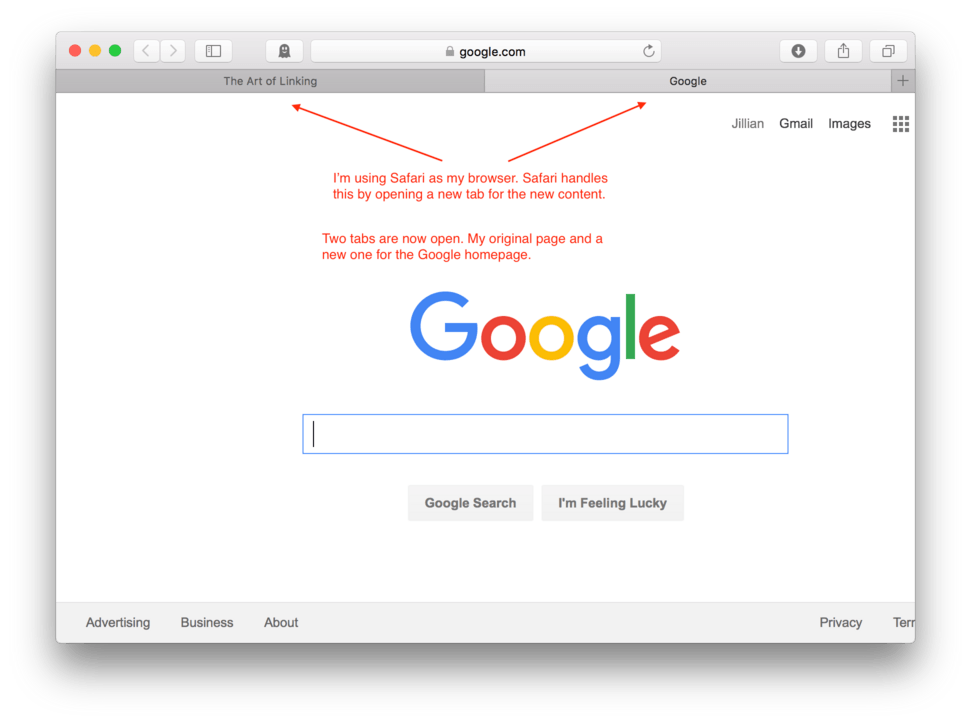
<a href="http://www.google.com" target="_blank">Google!</a>To open the Google homepage in a new browser. - Save, Refresh, and Test in your browser.
If things went well, we’ll now have either two tabs or two browser windows: one with our original lesson05.html and one with the Google homepage. Mine now looks like this: (fig. 15)
MailTo Links
The last kind of link we’ll work on in this lesson is called the “mailto link”. This is a link that automatically opens our user’s mail client and fills in the “To:” line with a predetermined email address. This is particularly useful for businesses to use on their contact pages so customers can quickly and easily send them an email.
The mailto link works just like any other link. The only difference here is, not surprisingly, the address that appears in the href= attribute. Instead of tying a set of instructions to a file, we type: "mailto: then the email address we want the email sent to, followed by the double quotation marks we always use to end an attribute. The rest of the link is the same. We can use either a text or an image link.
Let’s add an example to our lesson05.html page.
- Add
<h2>Mailto Link</h2>to the end of your code - On the next available line, let’s write our link. I’m going to use: hello@elbongurk.com but you can use your own email address as well.
<a href="mailto:hello@elbongurk.com"> - Type in the text (or image) you want to use for the link. I’m going to type: “
Email Elbongurk”. - Make sure to end the link with a
</a>.
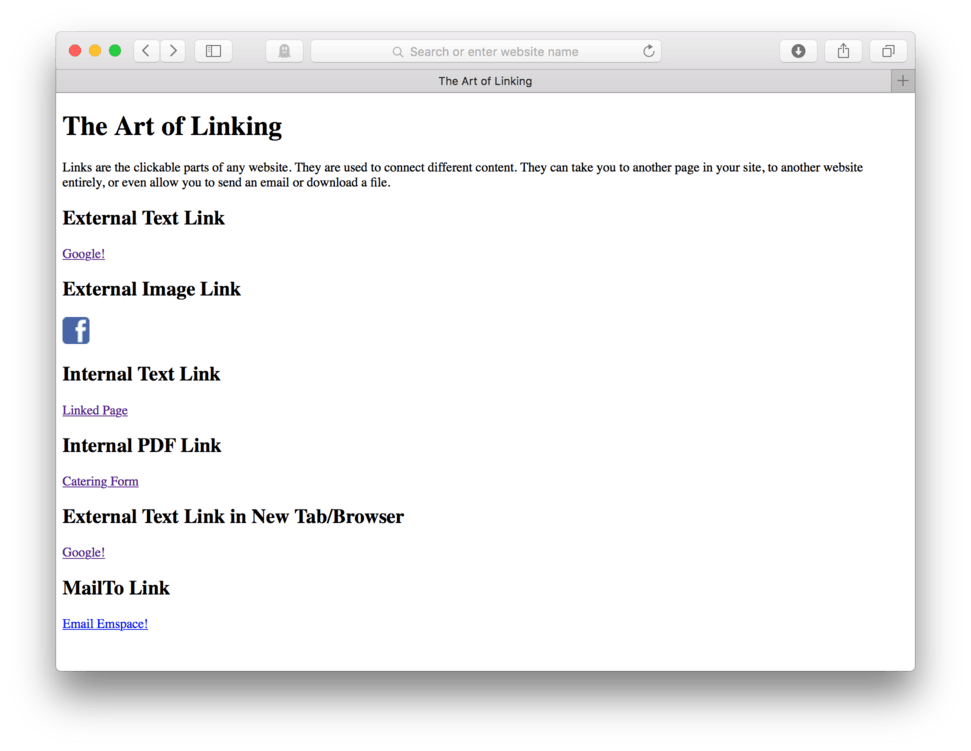
My code now looks like this:
<!doctype html>
<html>
	<head>
		<title>The Art of Linking</title>
	</head>

	<body>
		<h1>The Art of Linking</h1>
		<p>Links are the clickable parts of any website. They are used to connect different content. They can take you to another page in your site, to another website entirely, or even allow you to send an email or download a file.</p>

		<h2>External Text Link</h2>
		<a href="http://www.google.com">Google!</a>

		<h2>External Image Link</h2>
		<a href="http://www.facebook.com">
			<img src="images/facebook.png" />
		</a>

		<h2>Internal Text Link</h2>
		<a href="linkedpage.html">Linked Page</a>

		<h2>Internal PDF Link</h2>
		<a href="images/catering.pdf">Catering Form</a>

		<h2>External Text Link in New Tab/Browser</h2>
		<a href="http://www.google.com" target="_blank">Google!</a>

		<h2>MailTo Link</h2>
		<a href="mailto:hello@elbongurk.com">Email Elbongurk!</a>

	</body>

</html>
It should look like this in the browser: (fig. 16).
Now, go ahead and test out the link.
I use Apple Mail as my default mail client, so when I click the link, mine looks like this: (fig. 17).
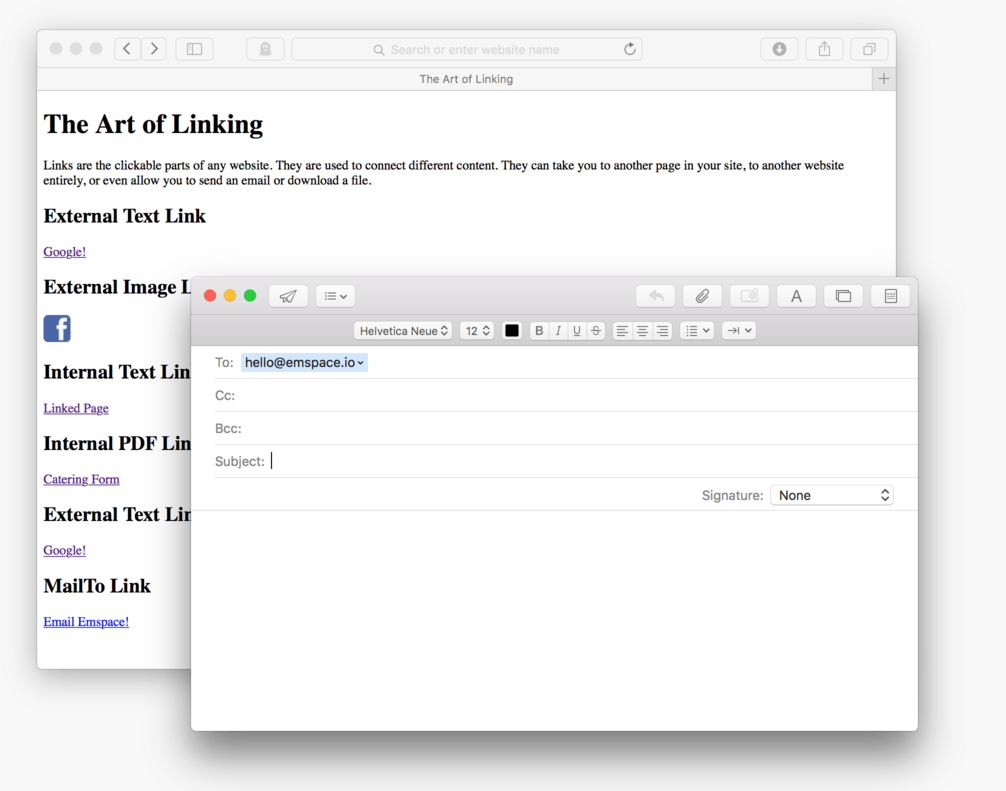
You’ll notice how the email address we entered as part of the href= is already prefilled in the To: line of this email. Pretty neat, huh?
Better MailTo Link
So, now that we’ve talked about using the mailto link and what it’s for, I have a suggestion. Not everyone is going to be able to make good use of the prefilled address you include in the mailto link. Some people may not have a default email client configured, or maybe they are using a shared computer in a computer lab where this probably wouldn’t be configured for each individual person.
To make sure that everyone can email who want to email, I’m going to go ahead and suggest that you go ahead with the mailto link, but in addition, make the link text the actual email address. This way anyone who cannot take advantage of the actual mailto link can still see the email address, copy and paste it, or do whatever they want to make sure they can email you if they want.
Here is the HTML:
<h2>Better MailTo Link</h2>
<p>Send an email to:
	<a href="mailto:hello@elbongurk.com">hello@elbongurk.com</a>
</p>
and here’s how it looks like this in the browser. (fig 18.).
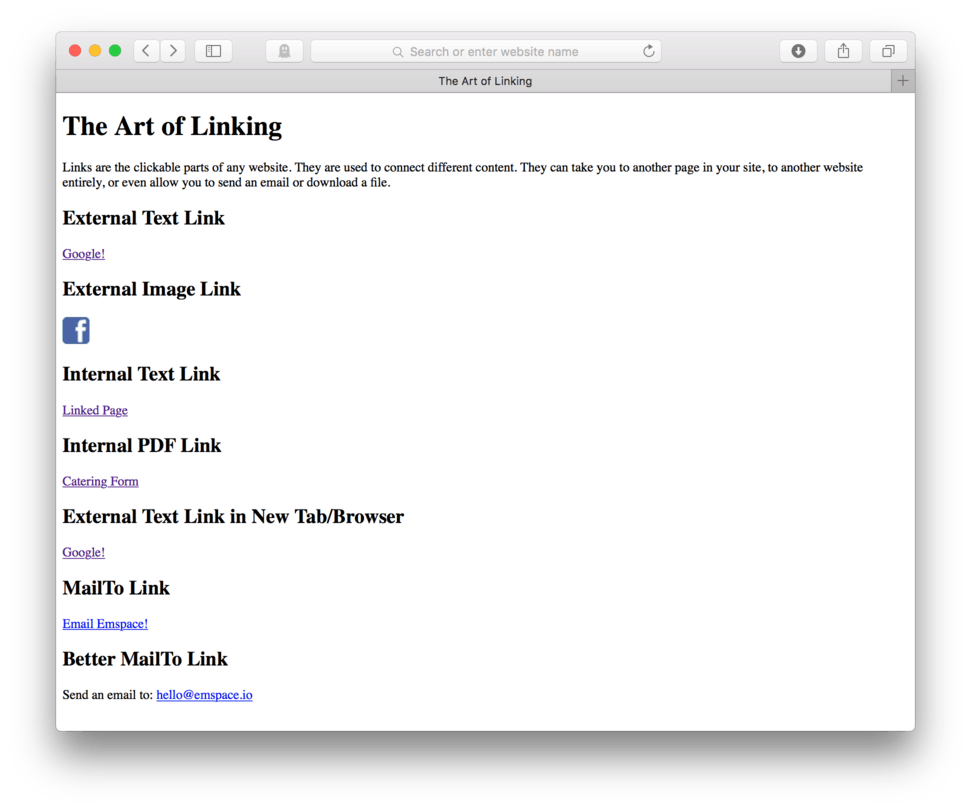
Note: You’ll see that the email client still pops up if you click this link, but in case that isn’t an option for our user, they can still see our email address in case they want to write it down or copy and paste it into their web-based email client.
You may also have noticed that I nested that mailto link right inside a set of <p></p> tags. The result in the browser is a link appearing right in the middle of a sentence, rather than on its own line. This is because links are inline elements.
If you remember from Lesson 3 where we introduced the <img /> tag, we also discussed the difference between inline and block-level elements. We saw that images are inline elements and allow other images to come up and sit side by side. Inline elements can be placed inside block-level elements, like in the case of this mailto link, so that just a small part of any text can become a link.
It makes good sense if you think about it. A link in the text is just an opportunity to jump to some new kind of content. In the case of a paragraph that links to something like an email, it is just that, an opportunity. In many cases, a user will just continue reading through the paragraph. Some will click the link, some won’t but the possibility is there.
Inline vs. Block-Level Elements
So far, we now learned about two different inline elements:
- images (without the
<figure>tag) - links (external, internal, mailto)
and we’ve discussed a bunch of block-level elements:
- headings (h1, h2, h3, h4, h5 and h6)
- paragraphs
- figures
- figure captions
- ordered lists
- unordered lists
- list items
- description lists
- definition terms
- definition descriptions
You’ll notice that the list for block-level elements is much longer than the inline list. It’s true. Most elements are going to be block-level by default. I like to think about it in terms of importance. Block-level elements are the most important, they get to have 100% of the width. Nobody gets to sit next to them, whereas inline elements are supporting elements and help add something extra to the block-level.
Links and images are a good example. These thing add extra meaning to the text, but alone don’t carry the heavy part of the load. As supporters, they don’t get to have 100% of the screen, they only take up the space they need and allow themselves to squeeze in places where they are needed.
Lesson Conclusion
This lesson covered links. We learned about the differences between text links and image links. We went though a few examples of the various reasons you might use one over the other. We also spent a great deal of time on the idea of external vs. internal links. We looked at linking to documents in our root folder like PDF forms. Lastly, we learned how to setup a mailto link in two different ways to ensure our page visitors can make the best use of our page.
Next up, styling our content.