Tables & Lists
Overview
In this lesson we’ll be learning how to code different kinds of lists and tables in HTML. Lists and tables are extremely valuable for organizing your content and later, for controlling how certain types of content gets presented in the layout of the page.
Lesson Setup
Let’s begin by creating the folders and files we’ll need for this lesson.
- Create a new Lesson04 folder inside of Bob
- Create two subfolders: notes and root
- Inside the root folder, create an images folder
- Download the lesson 4 images from here.
- Move those images into your images folder for this lesson
- Open up TextMate
- File > New to open a new file
- Code in the boilerplate HTML making sure to add the title: Working with Tables and Lists
- Save your HTML file to your Lesson04 root folder with the name: lesson04.html
Your file and folder structure should look like (fig. 1)

Your HTML should look something like this:
<!doctype html>
<html>
  <head>
    <title>Tables and Lists</title>
  </head>

  <body>


  </body>

</html>
- Launch your web browser
- Open your lesson04.html file
Here’s about how it should look in your browser. (fig. 2)

Note: You may have noticed that I’ve shortened the lesson setup to a list of action steps above. If you need a refresher on folder and file organization see the lesson 3 setup section.
Using Lists
In this lesson, we’ll be creating a webpage featuring a recipe. A recipe is a great example of web content that is easily organized into different sorts of lists since it usually has information that would be listed such as ingredients and instructions.
Ordered Lists
Ordered lists simply put, are a set of chronologically numbered items. Ordered lists are called ordered lists because the order of the list items is important. An example of an ordered list would be the set of steps or instructions that you would need to follow to make cookies. It’s important that we follow baking instructions in order, so it would be most useful to our recipe user to create this list of steps using a ordered list.
Instructions
- Preheat oven to 350 degrees F (175 degrees C)
- Sift together the flour and baking soda, set aside
- In a large bowl, cream together the butter, brown sugar, and white sugar
- Beat in the instant pudding mix until blended
- Stir in the eggs and vanilla
- Blend in the flour mixture
- Stir in the chocolate chips and nuts
- Drop cookies by rounded spoonfuls onto ungreased cookie sheets
- Bake for 10 to 12 minutes or until edges are golden brown
Before we can code our list, we need to know a little bit about how lists are structured in HTML. Ordered lists require us to learn two new HTML tag pairs: <ol></ol> (stands for ordered list) to begin and end an ordered list and <li></li> (stands for list item) to identify items inside the list.
Each ordered list begins with a <ol> tag followed by a series of <li>List item goes here</li> and then after all list items have been entered, the list finishes with an </ol>. There can be essentially an unlimited number of items on the list. Each one just needs to be couched inside its very own <li></li> tag pair. The list items are tabbed in to easily see that they live inside the ordered list tags and the finished code will look something like this:
<ol>
	<li>First list item goes here</li>
	<li>Second list item goes here</li>
	<li>Third list item goes here</li>
</ol>
Notice how each item inside the list is neatly in-between the beginning and ending list item tags (<li></li>). Also, notice how the list is structured with tabs so we can easily see what lives inside the list.
Let’s go ahead and add an ordered list to our page with the following items:
- Preheat oven to 350 degrees F (175 degrees C)
- Sift together the flour and baking soda, set aside
- In a large bowl, cream together the butter, brown sugar, and white sugar
- Beat in the instant pudding mix until blended
- Stir in the eggs and vanilla
- Blend in the flour mixture
- Stir in the chocolate chips
- Drop cookies by rounded spoonfuls onto ungreased cookie sheets
- Bake for 10 to 12 minutes or until edges are golden brown
- Insert your cursor in the line after your opening body tag and hit Enter to leave one line of space
- Type
<ol>to begin your list and hit Enter - Tab in, then type
<li>to begin your first list item - Now, copy and paste or type in your first list item
- End the list item by typing
</li>after your item (make sure to wrap the part in parenthesis in a set of<em></em>tags to create emphasized text) - Hit Enter to move to the next line
- Repeat steps 3, 4, 5, and 6 for each of the list items
- When all list items have been entered, type
</ol>to end your list
Your HTML should now look like this:
<!doctype html>
<html>

	<head>
		<title>Tables and Lists</title>
	</head>

	<body>

		<ol>
			<li>Preheat oven to 350 degrees F <em>(175 degrees C)</em></li>
			<li>Sift together the flour and baking soda, set aside</li>
			<li>In a large bowl, cream together the butter, brown sugar, and white sugar</li>
			<li>Beat in the instant pudding mix until blended</li>
			<li>Stir in the eggs and vanilla</li>
			<li>Blend in the flour mixture</li>
			<li>Stir in the chocolate chips</li>
			<li>Drop cookies by rounded spoonfuls onto ungreased cookie sheets</li>
			<li>Bake for 10 to 12 minutes or until edges are golden brown</li>
		</ol>

	</body>

</html>
Now Save your HTML file and Refresh your page in your browser.
Your page should look something like (fig. 3)
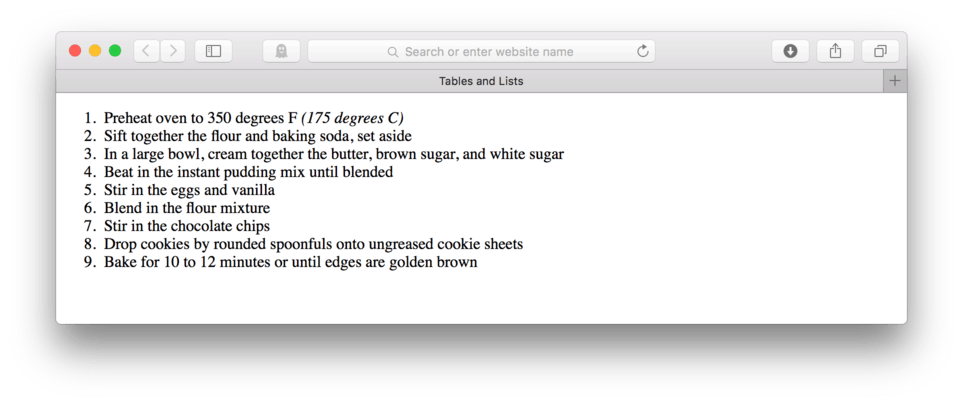
Not bad, right? I do think something is missing though. I think this needs a heading so that our customers know this list is part of a set of instructions. Let’s go ahead and add an h2 for that.
- Insert the cursor on the open line just before the
<ol>and hit Enter to make room for our h2 - On the newly open line, type:
<h2>Instructions</h2> - Save your file and Refresh you page in your browser
Your html between the body tags should now look like this:
	<h2>Instructions</h2>
	<ol>
		<li>Preheat oven to 350 degrees F <em>(175 degrees C)</em></li>
		<li>Sift together the flour and baking soda, set aside</li>
		<li>In a large bowl, cream together the butter, brown sugar, and white sugar</li>
		<li>Beat in the instant pudding mix until blended</li>
		<li>Stir in the eggs and vanilla</li>
		<li>Blend in the flour mixture</li>
		<li>Stir in the chocolate chips</li>
		<li>Drop cookies by rounded spoonfuls onto ungreased cookie sheets</li>
		<li>Bake for 10 to 12 minutes or until edges are golden brown</li>
	</ol>
Your page should now look like (fig. 4) in the browser.
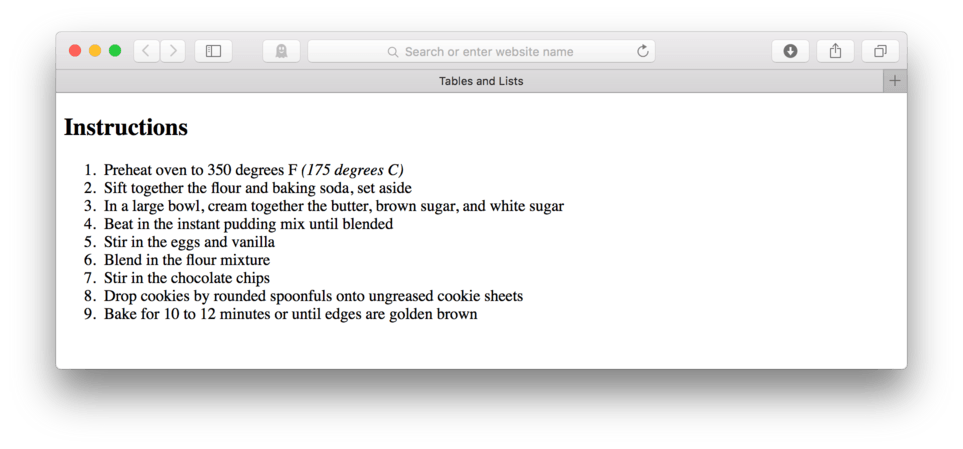
Good work. We just finished our first ordered list. A few things to notice about these guys: you don’t actually have to type in any numbers, the browser adds those in for you. Also, the list items are indented a small amount to the left compared to other text items, this creates a visual cue that groups the items and separates them from the other HTML elements on the page. Lastly, each element in the list is block-level. Remember that this means that it takes up 100% of the screen so it doesn’t allow anyone to come up and sit next to it, even if there is extra room.
Unordered Lists
More often than not, your lists won’t need to be numbered. In most cases a simple bulleted list will do. This is exactly what you get when you create an unordered list. Unordered lists look much like their ordered cousins in both code structure and on the page, but use bullet points or other simple graphical elements instead of numbers in front of the list items like this:
- First list item
- Second list item
- Third list item
Unordered lists only require us to learn one new HTML tag pair, <ul></ul>. The “ul” stands for unordered list, convenient, huh? The <ul></ul> tag pair works in the exact same way as the <ol></ol> tag pair does in an ordered list, the opening tag before any list items and the closing tag at the very end. Both list types use <li>,/li> to hold their list items.
An unordered list in HTML looks like this:
<ul>
	<li>First list item</li>
	<li>Second list item</li>
	<li>Third list item</li>
</ul>
This should be very familiar, as it is nearly identical to the ordered list we just made. There is only the slightest difference in the parent list tag.
It just so happens that our cookie recipe has a list of ingredients that we’ll need to have in order to make our cookies. This is the perfect opportunity for us to try out coding an unordered list. Typically we would list the ingredients above the instructions, so we’ll begin or unordered list above or ordered list.
- Place your cursor Above our
<h2>Instructions</h2>and hit Enter twice to make some room - Type:
<ul>to begin the list and hit Enter - Tab in and type
<li>to begin your first list item - Now, copy and paste or type in your first list item
- End the list item by typing
</li>after your item - Hit Enter to move to the next line
- Repeat steps 3, 4, 5, and 6 for each of the following list items making sure to take notice of the emphasized text:
- 4 1/2 cups all-purpose flour
- 2 teaspoons baking soda
- 2 cups butter, softened
- 1 1/2 cups packed brown sugar
- 1/2 cup white sugar
- 2 (3.4 ounce) packages instant vanilla pudding mix
- 4 eggs
- 2 teaspoons vanilla extract
- 4 cups semisweet chocolate chips
- 2 cups chopped walnuts (optional)
- When all list items have been entered, type
</ul>to end your list
The HTML should now look like this:
	<ul>
		<li>4 1/2 cups all-purpose flour
		<li>2 teaspoons baking soda
		<li>2 cups butter, softened
		<li>1 1/2 cups packed brown sugar
		<li>1/2 cup white sugar
		<li>2 <em>(3.4 ounce)</em> packages instant vanilla pudding mix
		<li>4 eggs
		<li>2 teaspoons vanilla extract
		<li>4 cups semisweet chocolate chips
		<li>2 cups chopped walnuts <em>(optional)</em>
	</ul>
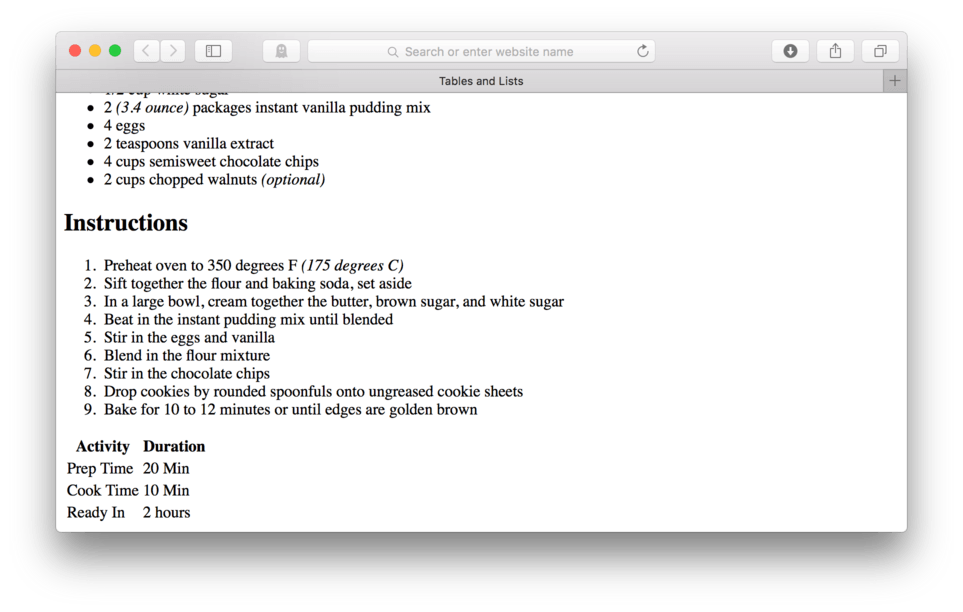
Now Save your file and Refresh in your browser. Your page should look something like (fig. 5).
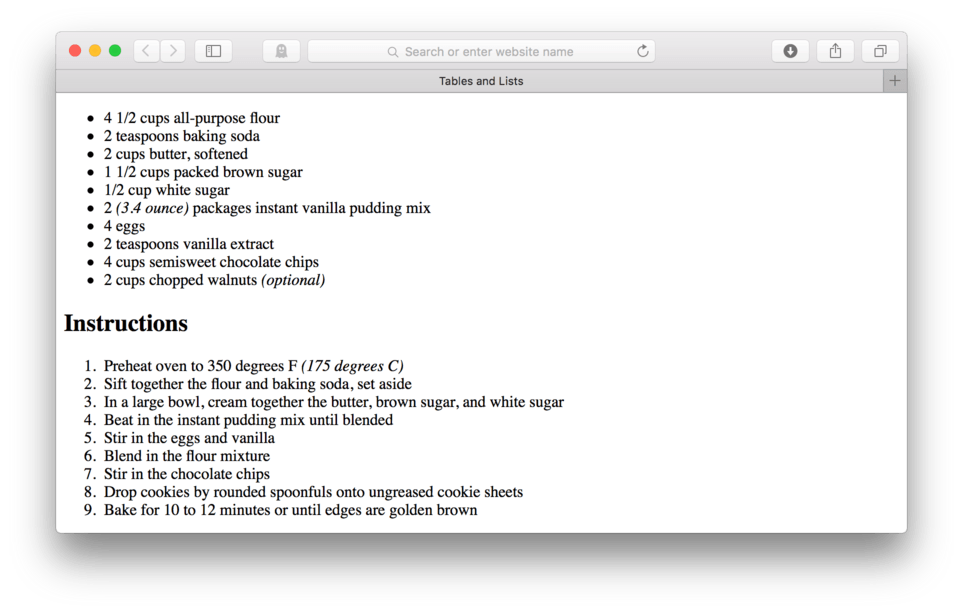
We have our bulleted list. Let’s go ahead and add <h2>Ingredients</h2> above the unordered list for consistency and clarity. Then, make sure to Save and Refresh in your browser
The new chunk of HTML code following the ordered list should look like this:
	<h2>Ingredients</h2>
	<ul>
		<li>4 1/2 cups all-purpose flour
		<li>2 teaspoons baking soda
		<li>2 cups butter, softened
		<li>1 1/2 cups packed brown sugar
		<li>1/2 cup white sugar
		<li>2 <em>(3.4 ounce)</em> packages instant vanilla pudding mix
		<li>4 eggs
		<li>2 teaspoons vanilla extract
		<li>4 cups semisweet chocolate chips
		<li>2 cups chopped walnuts <em>(optional)</em>
	</ul>
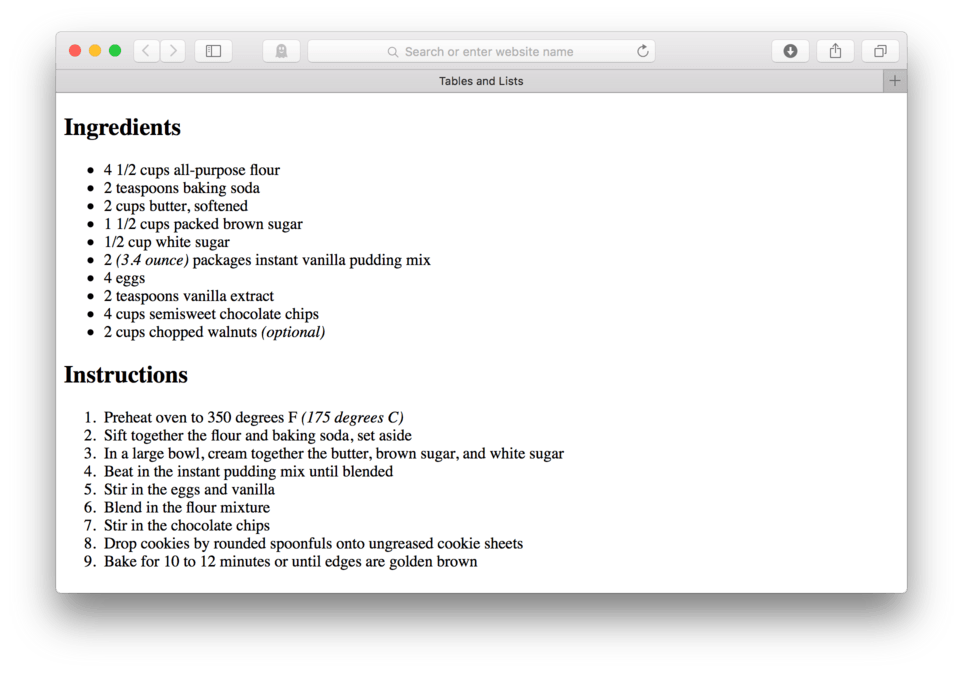
Your page should now look like this: (fig. 6).
There. We made our way through two of the three list types in HTML and I bet it wasn’t even that bad. Now that we’ve got our list confidence up, let’s take on the third list type, the description list.
Description Lists
Description lists are just a bit more complex than ordered or unordered lists. This is because instead of just having single items listed, it allows for two pieces of information per list item, a definition term and a definition description. As you might have guessed from its name, a description list was incorporated into HTML so that you could have a list of terms and their definitions presented together, similar to the common setup of a dictionary. It’s essentially a way to list as a unit two different bits of related information.
Just like ordered and unordered lists, the list element itself wraps all of the items. The HTML tag pair for a description list is written <dl></dl>. The “dl” stands for description list. Where the list structure differs from the other two types of lists is in the list item tags.
Instead of a simple open/close system of <li>,/li>, the description lists use two pairs of tags: <dt></dt> for the definition term and <dd></dd> for the definition description. The list is written as repeated sets of <dt></dt> and <dd></dd> tags and look like something like (fig. 7) on the screen by default.
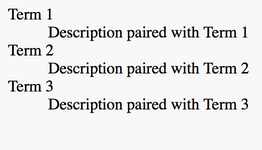
In HTML a description list looks like this:
<dl>
  <dt>Term 1</dt>
  <dd>Description paired with Term 1</dd>

  <dt>Term 2</dt>
  <dd>Description paired with Term 2</dd>

  <dt>Term 3</dt>
  <dd>Description paired with Term 3</dd>
</dl>
Note: I’ve added extra space between the sets of
<dt></dt>and<dd></dd>to make it easier to work with and see when I’m writing the code. Hitting Enter (to add extra white space) is a really good way to help you not only see what you’re currently working on better, but helps you find bits and pieces of specific code when you come back later to make changes. Feel free to use as much white space as you want. Tabs and Enter’s are free!
We’re going to use a description list to organize our cookie reviews. This is a good fit for a description list because these items have two types of information per list item: a written review and an attribution to give the person who wrote the review. This pairing will easily fit into the idea of a term, in this case the review, and definition, in this case the reviewer’s name.
Here are our reviews and their authors:
- Everybody wants this recipe when I take them in for a carry-in. - Sally Monroe
- My daughter made them for a cookie baking contest and won a red ribbon! - Rob Buford
- Makes great cookies! - Nancy Place
Let’s go ahead and build our description list based on our reviews. We’ll be adding the list of reviews before our list of ingredients.
- Place your cursor above your Ingredients h2 and hit Enter twice to make room. Begin your list at the same left indent as the unordered list below it
- Type:
<dl>to begin the list and hit Enter to move to the next line - Tab in and type
<dt>to begin your first definition term - Now, Copy and Paste or type in:
Everybody wants this recipe when I take them in for a carry-in. - End the definition term by typing
</dt>after your item - Hit Enter to move to the next line
- Tab in and type
<dd>to begin your first definition description - Now, Copy and Paste or type in:
- Sally Monroe - End the definition term by typing
</dd>after your item - Hit Enter twice to leave space between items
- Repeat steps 3-10 for each of the last two reviews (listed above):
- When all list items have been entered, type
</dl>to end your list
The HTML should now look like this:
<body>

	<dl>
		<dt>Everybody wants this recipe when I take them in for a carry-in.</dt>
		<dd>- Sally Monroe</dd>

		<dt>My daughter made them for a cookie baking contest and won a red ribbon!</dt>
		<dd>- Rob Buford</dd>

		<dt>Makes great cookies!</dt>
		<dd>- Nancy Place</dd>
	</dl>

	<h2>Ingredients</h2>
	<ul>

	...
Save your HTML file and Refresh your browser page.
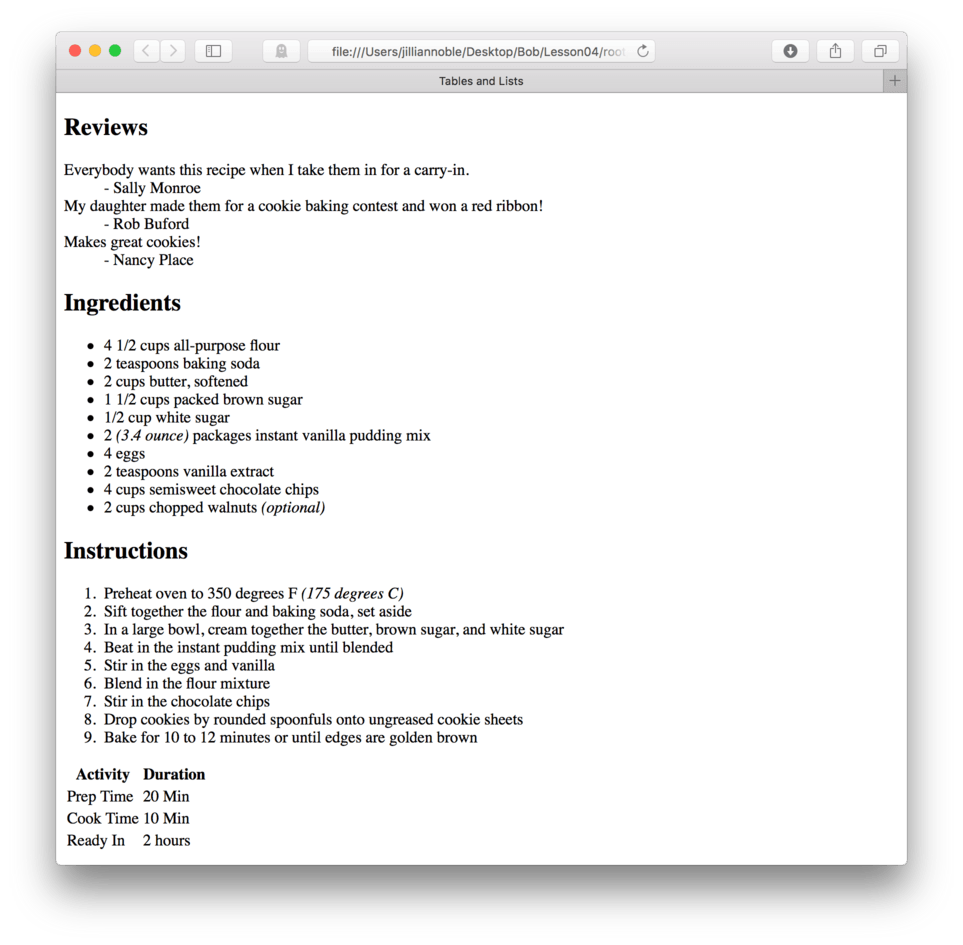
Your page should now look like this: (fig. 8)
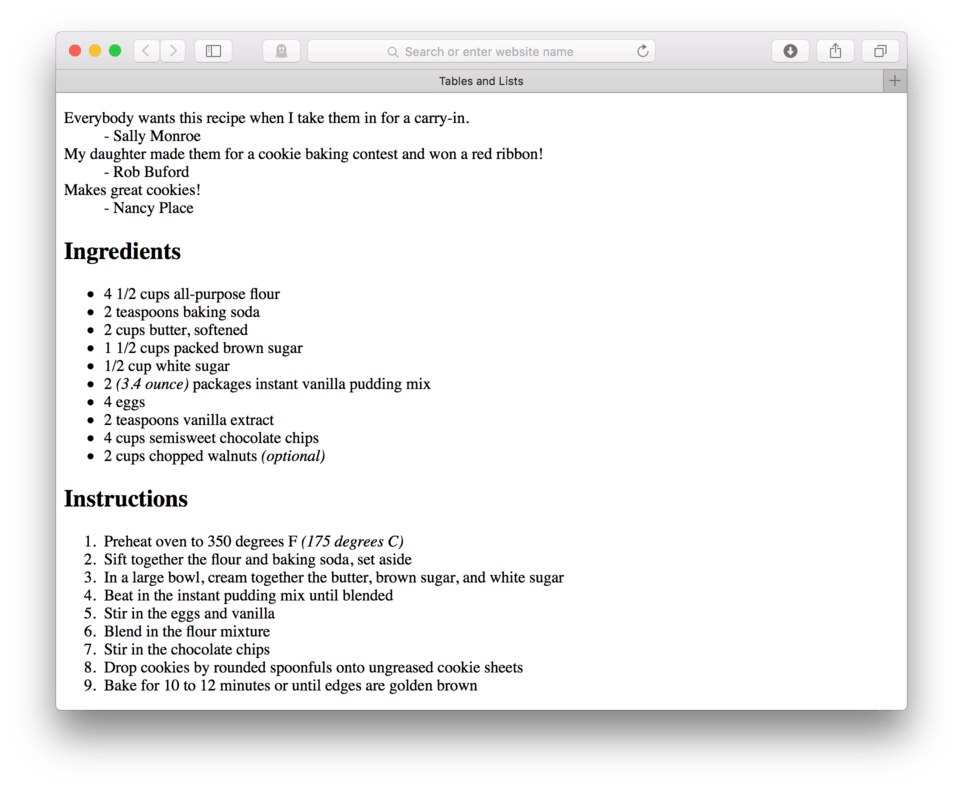
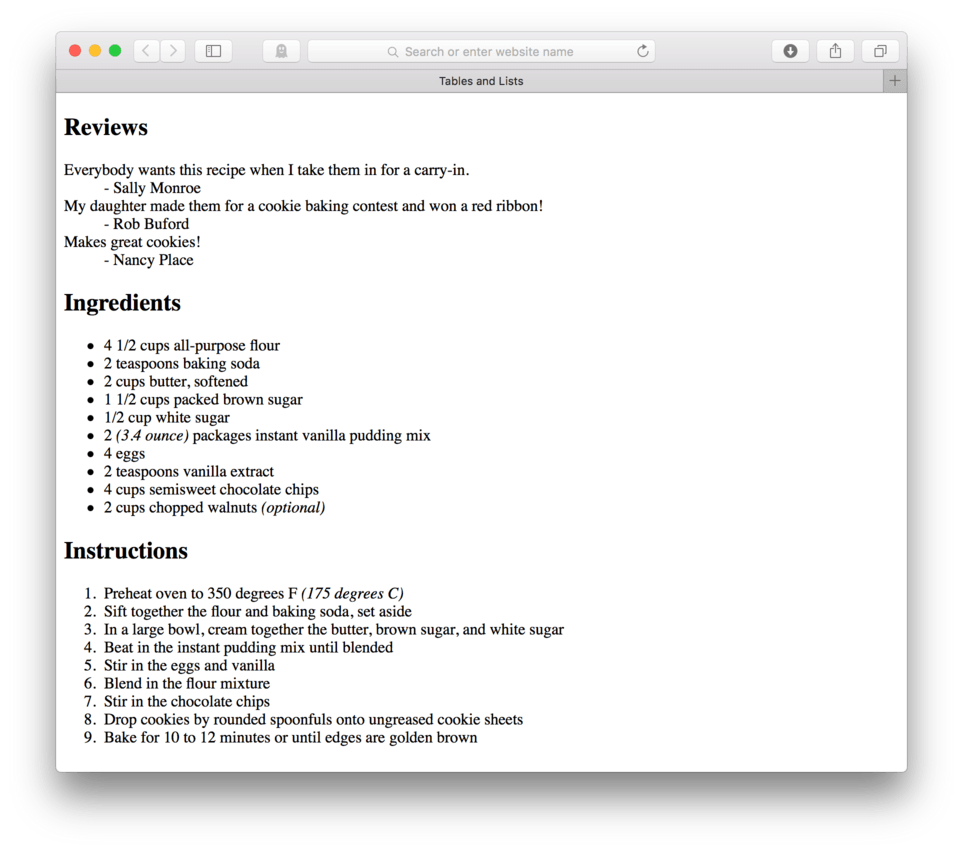
Just like in the other two lists, we’ll go ahead and add an h2 to give this list a title. We’ll call it “Reviews”. Go ahead and add the HTML and check that your site looks like mine: (fig. 9).
Good deal, you did that one all on your own, you’re really getting the hang of this. Ok, so let’s take a look at this description list and see what the browser is doing with the information.
We see that there aren’t any special characters added to the list items like the numbers or bullet points we saw in the other two list types. Instead, the browser left aligns the definition term <dt> and indents the <dd> which are broken up into two separate lines. Later this will allow us to style each piece separately which gives us a lot of control when we start working on the presentation of our site.
Nesting Lists
Now that we’ve learned about all three list types, it’s worth mentioning that you can nest lists inside of other lists. This means that you can have much deeper organization within your lists.
Think of any outline you’ve created in the past, sometimes you only have one level of bullets, but many times you have sub-points. The same is true for HTML lists, you can have a list (ordered, unordered, or definition) living inside of any other type of list or even the same type. Let’s take a look at a few examples to clarify what I mean.
Example 1
Let’s say I want to create an outline that has three levels to help me organize a big group of people into three groups, each group having four people, one of those people being the team lead. I could make an HTML list that looks like this:
- Team 1 - Blue Team
- Team Lead - Caren
- Pat
- Dan
- Alice
- Team 2 - Red Team
- Team Lead - Bob
- Doug
- Sam
- Charlene
- Team 3 - Green Team
- Team Lead - Bette
- Tina
- Nicole
- Chuck
Inside this list we have multiple lists, some unordered and other ordered. I was able to accomplish this by nesting unordered lists inside of a big ordered list. The HTML for this looks like this:
<ol>
	<li>Team 1 - Blue Team</li>

		<ul>
			<li>Team Lead - Caren</li>

				<ul>
					<li>Pat</li>
					<li>Dan</li>
					<li>Alice</li>
				</ul>

		</ul>

	<li>Team 2 - Red Team</li>

			<ul>
				<li>Team Lead - Bob</li>

					<ul>
						<li>Doug</li>
						<li>Sam</li>
						<li>Charlene</li>
					</ul>

			</ul>

	<li>Team 3 - Green Team</li>

			<ul>
				<li>Team Lead - Bette</li>

					<ul>
						<li>Tina</li>
						<li>Nicole</li>
						<li>Chuck</li>
					</ul>

			</ul>
</ol>
By using a combination of lists and list types, I’m able to have numbering, and bullet points at several levels allowing for more organization in my list. Be very careful when nesting lists however, you need to make very sure that you are opening and closing the correct tag pairs. It helps quite a bit to use tabs and spaces to keep the structure of you nested lists visible.
Example 2
Let’s try one more nested list example using a description list and an ordered list. Let’s say I want to create something like a dictionary, where there can be more than one meaning for a word. I want to use a number list (an ordered) list inside my definition description (dd). To do this I can simple nest an <ol></ol> inside my <dd></dd> like this:
- train
-
- Railroads. a self-propelled, connected group of rolling stock.
- a line or procession of persons, vehicles, animals, etc., traveling together.
- Military. an aggregation of vehicles, animals, and personnel accompanying an army to carry supplies, baggage, ammunition, etc.
- a series or row of objects or parts.
- Machinery. a connected set of three or more rotating elements, usually gears, through which force is transmitted, or motion or torque changed.
As you can see, I have been able to have 5 numbered items follow my definition term by nesting an ordered list inside the definition description. The same thing only with bullet points could be achieved by nesting an unordered list in the same way.
The HTML for the list I created above looks like this:
<dl>
	<dt>train</dt>
	<dd>
		<ol>
			<li>Railroads. a self-propelled, connected group of rolling stock.</li>
			<li>a line or procession of persons, vehicles, animals, etc., traveling together.</li>
			<li>Military. an aggregation of vehicles, animals, and personnel accompanying an army to carry supplies, baggage, ammunition, etc.</li>
			<li>a series or row of objects or parts.</li>
			<li>Machinery. a connected set of three or more rotating elements, usually gears, through which force is transmitted, or motion or torque changed.</li>
		</ol>
	</dd>
</dl>
Alright, cool. We can now use multiple lists and nested lists to help us organize our content even more.
Now, that we have finished learning about lists for now, we can move on. We have more content to add to this recipe. We want to include approximate duration times for our prep work, our cook time and our estimated ready in time so our users know how much time to plan for. In order to organize this information, we’ll learn how to code HTML tables.
Tables
Tables are useful in HTML when you want to store tabular data. Typically when we think of tabular data, we think of spreadsheets. That is a pretty accurate description of what HTML thinks of when it sees a table. A table is a simple organizational structure that allows us to code information in rows and columns, just like we would see in a spreadsheet.
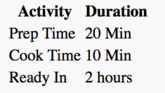
Let’s say we want to use a table to display our different duration times. We could arrange a simple two column table. The first column could be labeled “Activity” and the second column could be labeled “Duration”. Then we could create three rows letting our view quickly see the activity and the amount of time associated with each one. That’s our plan anyway.
It’s going to look something like (fig.10):
Coding a table may seem a little bit complex at first, but once you get the hang of the system, it actually will begin to make a lot of sense. First things first, we’ll need to learn four more tag pairs specific to HTML tables. I’ve listed them below (ironically, I used a table for this purpose).
| Tag Pair | Name | Description |
|---|---|---|
<table></table> |
table | opens and closes an HTML table element |
<tr></tr> |
table row | begins and ends every row in a table |
<th></th> |
table header | used to label columns in a table |
<td></td> |
table data | identifies content to fill individual table cells |
Tables have and use a ton of tags. It can be a little difficult to manage at first, but the most important thing is to understand the basic structure so you’ll be able to troubleshoot if something doesn’t seem to be working right. To begin this discussion, it might be best if we just jump in and begin working with the code. Let’s go ahead and code in the first few bits of our table.
- Hit Enter a few times to make room at the bottom of your HTML file. Make sure you are still working inside of your body tags.
- Begin the table by typing:
<table>and hit Enter to move to the next line
<table>
- To begin our first row, we need to tab in and type:
<tr>for table row and hit Enter
<table>
	<tr>
Next we need to to decide how many columns our table will need. We already know that our particular table will have two columns. We want the top of each of our columns to be labeled, “Activity” and “Duration” respectively. In HTML these labels are called table headers and are written with a pair of <th></th>.
- To begin our first column, we tab in and type:
<th>
<table>
	<tr>
		<th>
- Next we type in our first label or header content, “Activity”
<table>
	<tr>
		<th>Activity
- To close the table header, type:
</th>and hit Enter to move to the next line
<table>
	<tr>
		<th>Activity</th>
- To make our second column, we need to add another set of table headers with our content, “Duration” in between them, so we need to type:
<th>Duration</th>
<table>
	<tr>
		<th>Activity</th>
		<th>Duration</th>
We have created two columns by way of creating two table headers, so we have finished our first row.
- To indicate that our first row is complete, we need to end the table row, so we move to the next line and type:
</tr>.
<table>
	<tr>
		<th>Activity</th>
		<th>Duration</th>
	</tr>
This creates the first row of our table which will have two columns, one labeled “Activity” and the other labeled, “Duration”. Our next order of business is to create the second row in our table.
- Hit Enter twice to make some room
- Tab in and type:
<tr>to being a new table row and hit Enter
<table>
	<tr>
		<th>Activity</th>
		<th>Duration</th>
	</tr>

	<tr>
This second row will of course still have two columns. Since these columns are just regular table data, we use a pair of table data tags written: <td></td> to wrap our content.
- Type
<td>for our first table data entry
<table>
	<tr>
		<th>Activity</th>
		<th>Duration</th>
	</tr>

	<tr>
		<td>
- Now, we type in the content for this cell. We’ll type, “Prep Time”
<table>
	<tr>
		<th>Activity</th>
		<th>Duration</th>
	</tr>

	<tr>
		<td>Prep Time
- To indicate that the content is finished for that cell, we need to close the table data tag. Type:
</td>and hit Enter
<table>
	<tr>
		<th>Activity</th>
		<th>Duration</th>
	</tr>

	<tr>
		<td>Prep Time</td>
- Now, to add the content for the next column in that same row, we’ll type another:
<td>
<table>
	<tr>
		<th>Activity</th>
		<th>Duration</th>
	</tr>

	<tr>
		<td>Prep Time</td>
		<td>
- Now add the content, type:
20 Min
<table>
	<tr>
		<th>Activity</th>
		<th>Duration</th>
	</tr>

	<tr>
		<td>Prep Time</td>
		<td>20 Min
- To close out that content, we’ll type:
</td>and hit Enter
<table>
	<tr>
		<th>Activity</th>
		<th>Duration</th>
	</tr>

	<tr>
		<td>Prep Time</td>
		<td>20 Min</td>
- To finish that row, we need to type:
</tr>
<table>
	<tr>
		<th>Activity</th>
		<th>Duration</th>
	</tr>

	<tr>
		<td>Prep Time</td>
		<td>20 Min</td>
	</tr>
Great, we’ve completed our second row. This time with regular table data rather than table headers. Only our first row will ever contain table headers so every other row will look just like this one until our table is completed.
Let’s do another row together.
- Hit Enter twice to make room
- Type:
<tr>to begin the row and hit Enter - Type:
<td>to begin the first column’s data - Type: “Cook Time”
- Now close the table data tag. Type:
</td>and hit Enter - To add the content for the next column in that same row, we’ll type another:
<td> - Type:
10 Min - To end that column, type:
</td>and hit Enter - Now, to finish that row, type:
</tr>
Your HTML for the table should now look like this:
<table>
	<tr>
		<th>Activity</th>
		<th>Duration</th>
	</tr>

	<tr>
		<td>Prep Time</td>
		<td>20 Min</td>
	</tr>

	<tr>
		<td>Cook Time</td>
		<td>10 Min</td>
	</tr>
Hopefully you are starting to notice a pattern. It’s really important to keep track of exactly where you are in a table to make sure that every row has an identical number of cells whether they are table headers <th></th> or table data <td></td>. You also need to make sure that you are opening and closing each row with a <tr> at the beginning and a </tr> at the end. It’s best to be very organized when you write the code so that you can easily see where each row starts and ends.
See if you can do the last row on your own. The activity is “Ready In” and the duration is “2 hours”. No peeking until you’re done.
Ok, now you can check your work:
Your HTML for the table should now look like this:
<table>
	<tr>
		<th>Activity</th>
		<th>Duration</th>
	</tr>

	<tr>
		<td>Prep Time</td>
		<td>20 Min</td>
	</tr>

	<tr>
		<td>Cook Time</td>
		<td>10 Min</td>
	</tr>

	<tr>
		<td>Ready In</td>
		<td>2 hours</td>
	</tr>
If you didn’t have any errors, then congrats! That’s way awesome. If you had to tweak it a bit, don’t worry about it too much. Tables are tricky and take some practice. I would recommend going through this part of the lesson another time just to make sure you have the hang of it.
Let’s put the finishing touches on this table so we can see what it looks like in our browser. All we need to do is close it out.
- Hit Enter to move to the next line
- Type:
</table>to end the table - Save your file and Refresh your browser
Here’s how your finished table HTML should look:
<table>
	<tr>
		<th>Activity</th>
		<th>Duration</th>
	</tr>

	<tr>
		<td>Prep Time</td>
		<td>20 Min</td>
	</tr>

	<tr>
		<td>Cook Time</td>
		<td>10 Min</td>
	</tr>

	<tr>
		<td>Ready In</td>
		<td>2 hours</td>
	</tr>
</table>
This is what mine looks like in the browser: (fig. 11)
Here’s my completed HTML for this page:
<!doctype html>
<html>

	<head>
		<title>Tables and Lists</title>
	</head>

	<body>
		<h2>Reviews</h2>
		<dl>
			<dt>Everybody wants this recipe when I take them in for a carry-in.</dt>
			<dd>- Sally Monroe</dd>

			<dt>My daughter made them for a cookie baking contest and won a red ribbon!</dt>
			<dd>- Rob Buford</dd>

			<dt>Makes great cookies!</dt>
			<dd>- Nancy Place</dd>
		</dl>

		<h2>Ingredients</h2>
		<ul>
			<li>4 1/2 cups all-purpose flour
			<li>2 teaspoons baking soda
			<li>2 cups butter, softened
			<li>1 1/2 cups packed brown sugar
			<li>1/2 cup white sugar
			<li>2 <em>(3.4 ounce)</em> packages instant vanilla pudding mix
			<li>4 eggs
			<li>2 teaspoons vanilla extract
			<li>4 cups semisweet chocolate chips
			<li>2 cups chopped walnuts <em>(optional)</em>
		</ul>

		<h2>Instructions</h2>
		<ol>
			<li>Preheat oven to 350 degrees F <em>(175 degrees C)</em></li>
			<li>Sift together the flour and baking soda, set aside</li>
			<li>In a large bowl, cream together the butter, brown sugar, and white sugar</li>
			<li>Beat in the instant pudding mix until blended</li>
			<li>Stir in the eggs and vanilla</li>
			<li>Blend in the flour mixture</li>
			<li>Stir in the chocolate chips</li>
			<li>Drop cookies by rounded spoonfuls onto ungreased cookie sheets</li>
			<li>Bake for 10 to 12 minutes or until edges are golden brown</li>
		</ol>

		<table>
			<tr>
				<th>Activity</th>
				<th>Duration</th>
			</tr>

			<tr>
				<td>Prep Time</td>
				<td>20 Min</td>
			</tr>

			<tr>
				<td>Cook Time</td>
				<td>10 Min</td>
			</tr>

			<tr>
				<td>Ready In</td>
				<td>2 hours</td>
			</tr>
		</table>

	</body>

</html>
Let’s Save and Refresh our browser to see what we ended up with (fig. 12).
Looking at this now, it looks pretty good but I realized that we missed a very important piece. Can you guess it? The h1! It’s always best practice to have an h1 on the top of each page giving a good description of the page content.
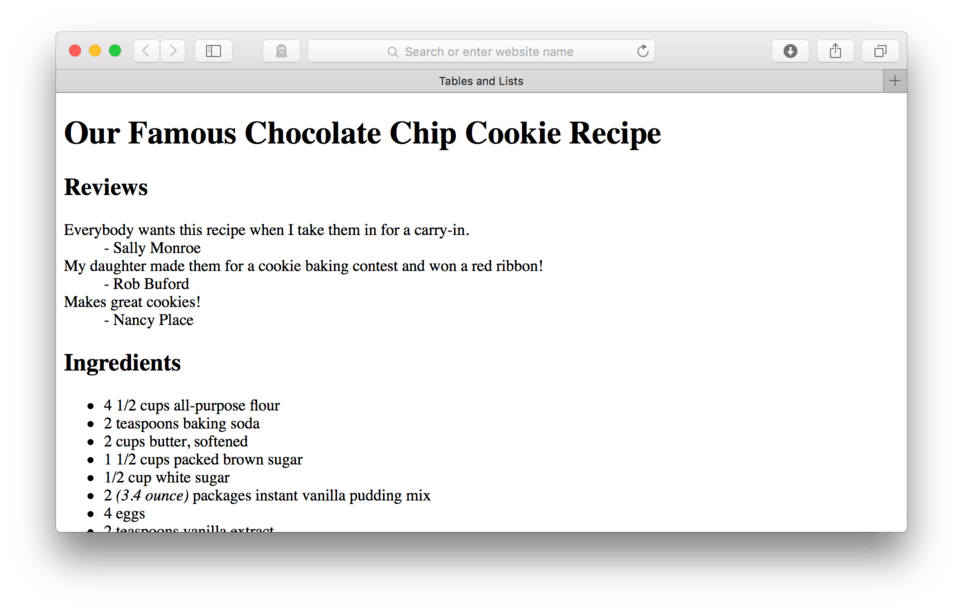
At the very top of my code, right after the opening body tag, let’s add an h1 and inside of it, let’s type: “Our Famous Chocolate Chip Cookie Recipe”.
Here’s my result: (fig. 13)
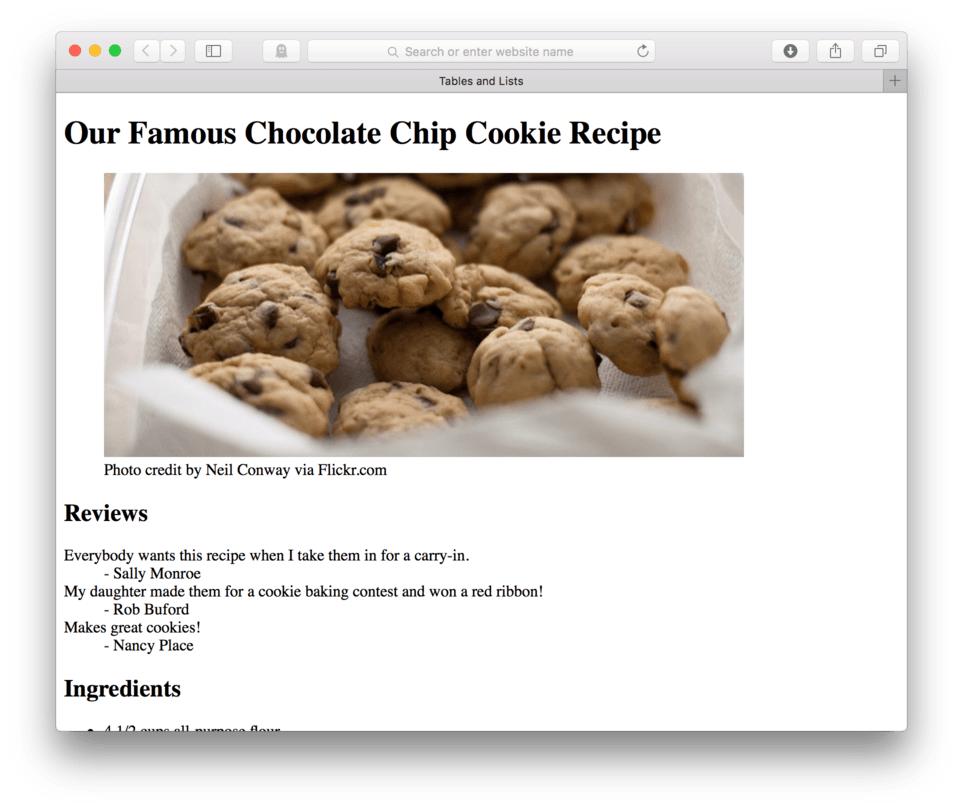
To make our cookie recipe just a little bit more enticing to our reader, we’ll add a photograph of the cookies with a caption to give credit to the photographer. People love to imagine the result of any recipe and a picture can help a lot in helping someone decide between recipes.
- After your h1, Hit Enter to move to the next line
- Add an opening figure tag to hold your image and your figure caption and hit Enter to move to the next line
- Add an image tag pointing to “cookies.jpg” living in our images folder
<img src="images/cookies.jpg" alt="photograph of finished batch of cookies" />and hit Enter to move to the next line - Using a pair of
<ficaption></figcaption>tags, add the following caption to the image, “Photo credit by Neil Conway via Flickr.com” and hit Enter to move to the next line - Close out the figure tag with a
</figure> - Save your HTML file
- Refresh your browser to preview your page
Here’s how your the beginning of your HTML should look:
	<body>
		<h1>Our Famous Chocolate Chip Cookie Recipe</h1>

		<figure>
			<img src="images/cookies.jpg" alt="photograph of finished batch of cookies" />
			<figcaption>Photo credit by Neil Conway via Flickr.com</figcaption>
		</figure>

		<h2>Reviews</h2>

		...
Here’s my final page result in the browser: (fig. 14)
I know you are probably dying to begin styling the content at this point, but you have to admit, even without any styling this page would be pretty darn useful to somebody who wants to know how to bake our famous chocolate cookies at home. The browser, by default, with a lot of help from the proper tag usage turns our coded content into a very readable and usable webpage.
Lesson Conclusion
In this lesson we learned all about lists and tables. We learned that there are three different types of list: ordered lists, unordered lists, and description lists. Each list type offers a specific formatting to organize certain types of listed information.
Ordered lists are great for when you need a numbered list and unordered lists work perfectly if what you need is a simply bulleted list. Description lists come in handy when you have list items that have two separate parts, often a term or word and a description.
We learned that tables are useful creatures for tabular data, but require a lot of very careful and organized coding. They use several different tag pairs to indicate rows, header, and data cells.
Coming up next, links!