Semantic Text
Overview
In this lesson we’ll start to explore writing the HTML code that allows a browser to recognize content (text, images, video, etc). Specifically, we’ll learn about how browsers understand and display text content.
We’ll learn about the baked in text hierarchy and ways to write our code so that the exact right type of text content uses the exact right set of code. This is called semantic code, and helps us make sure that all of our content is labeled and coded based on what the purpose of the code is based on the content it supports. A simple example would be that all paragraphs are coded as paragraphs. This is very important and is now part of our web design best practices.
Lesson Setup
To get started, we’ll need to first get organized. We’ll need to create our lesson folder structure just like we did in Lesson 1.
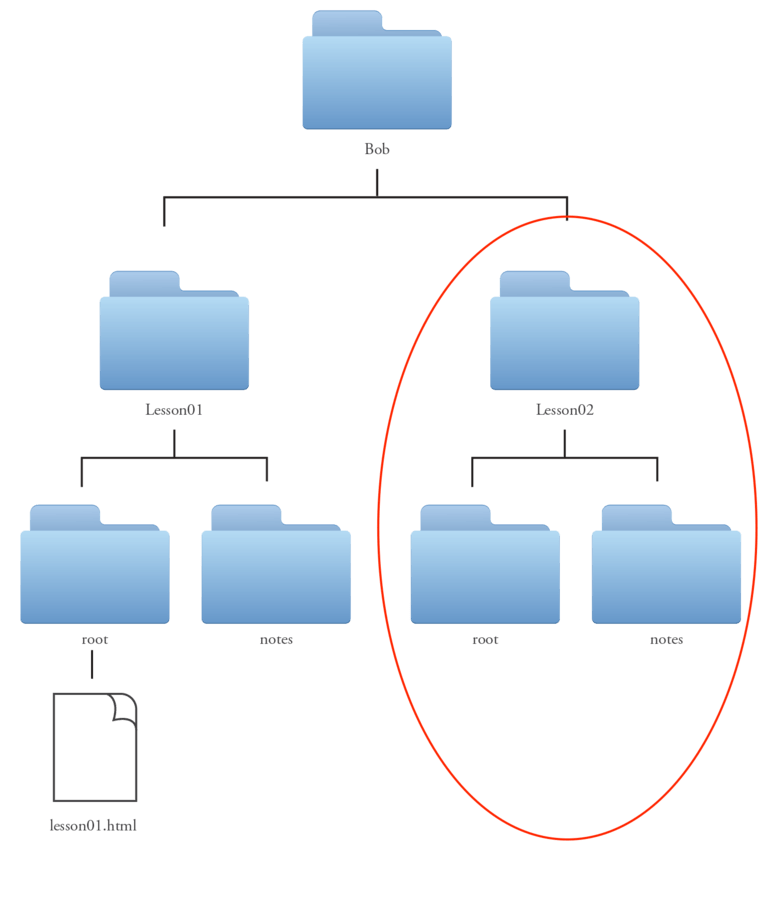
- Begin by creating a new folder inside of our Bob folder for this lesson and name it Lesson02. (The Lesson01 and Lesson02 folders should be side by side, make sure that one doesn’t accidentally live inside the other).
- Now, inside of the new Lesson02 folder, create two new folders. One folder for our notes (and any other materials we may collect for reference while working on this lesson) and most importantly, a root folder (to hold the new website we’ll be creating for the lesson) (fig. 1).
Organization is super important and we want to make sure we are set up for success. Repetition not only helps you remember but it helps develop good working habits.
Employ the Boilerplate
As we learned in the last lesson, every new webpage begins with a few lines of code that indicate to the browser what kind of file it is and what to do with it. We are calling these few lines of code the boilerplate, and we’ll begin this lesson’s site by creating a new TextMate file and coding them in.
- Launch TextMate
- File > New
- In the new TextMate window, type in the boilerplate code:
<!doctype html>
<html>
<head>
<title>Semantic Text</title>
</head>
<body>


</body>

</html>
You’ll notice I gave my page the title Semantic Text. You can name yours whatever you like. As a reminder, this is the only bit of actual content that lives in the boilerplate, meaning it’s the only thing that we typed in that is visible in the browser. All the other pieces are just setting up a framework for the rest of the page.
Save and Save Often
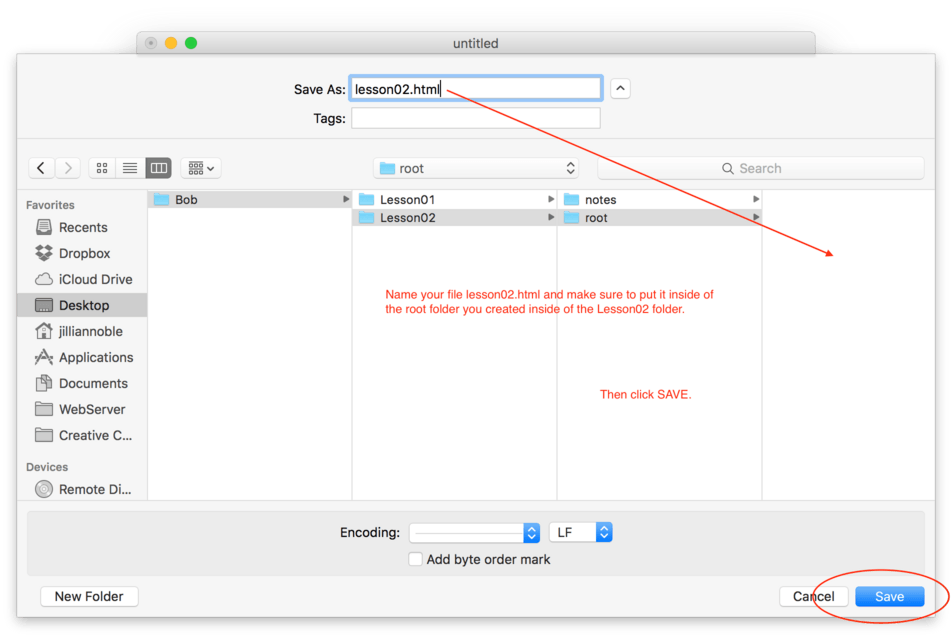
In order to preview our site in the browser, we’ll need to save the file as an HTML file inside of our Lesson02 root folder.
- From the TextMate menu select File > Save As
- Name the file lesson02.html and navigate to the root folder you created for Lesson02
- Hit Save (fig. 2).
Browser it Up
Now let’s open up that file in our browser and double check that everything looks good.
- Launch Safari (or browser of your choice)
- File > Open File and navigate to lesson02.html
- Hit Open
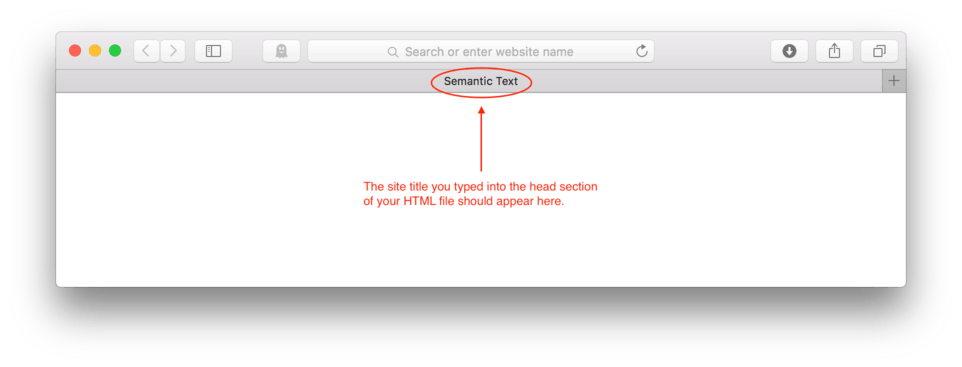
The telltale sign that your site is setup correctly is that you can see your title appear in the chrome of the browser either at the top or in the tab area if you have multiple tabs open. The body of the browser should just appear as a boring, blank, solid white nothing for now (fig. 3).
Moving On
By now you might be starting to memorize the initial steps for creating and previewing a website:
- Open up your code editor
- Type in the boilerplate code line by line
- Save your file correctly and in the right location
- Open the file in your favorite browser
- Check to make sure the title is appearing in the browser chrome properly
That is an excellent place to be, by the end of this book, you’ll be doing those things in your sleep (well actually, hopefully not).
Anyway, it’s time to talk more about how HTML code is structured and how it works. We’ve talked a little bit already about how important it is to make sure that you have beginnings and endings to the labels in HTML like <head> and </head> so you already have some of the basics down.
HTML Tags and Tag Pairs
HTML is a markup language. This is a fancy way of saying that content needs to be labeled or “marked up” in a specific way for a browser to understand what each part is. HTML uses what we call “tags” as the way of marking up the content. Tags are our way of communicating to the browser what each piece of content is, where it begins and ends, and roughly speaking how to display it. When we write the code, tags are the commands wrapped in angle brackets < and > (or carrots as I like to call them).
With only a handful of exceptions, HTML tags come in pairs. I like to think of these tag pairs like folders. This time I mean the real deal file folders found in any old fashioned office. The concept of digital folders do work mostly fine for this analogy, but I do prefer to imagine the pale yellow paper version.
File folders are designed specifically to hold and organize information. They have a front, they have a back, and inside they have content. This is usually just typed pages of information, but really it can be anything. Sometimes you might find photographs, hand written notes, business cards, bills, etc.
HTML tags have a very similar setup to file folders. Think of the opening tag like the front cover of the folder and the closing tag like the back cover. In-between these covers, inside the folder, you have the content. If you are in a well organized office, this folder will be clearly labeled as to what information can be found inside. If you are looking at correctly written, semantic HTML tags, they too should be labeled to identify what the content is inside.
In some cases, you may decide that it makes the most sense to put certain folders inside of other folders, creating subfolders. This is true with HTML tags as well. You’ll often find yourself nesting one tag pair inside of another tag pair, and there are lots of cases where you’ll nest many pairs inside of others creating a very deep, but organized system, and what emerges is hopefully a clear structure with a well organized hierarchy.
Let’s take a look at our boilerplate again and dissect a bit to see if we can bring a little more clarity to all this.
<!doctype html>
<html>
<head>
<title>Semantic Text</title>
</head>

<body>


</body>

</html>
You can pick out the HTML tags in our boilerplate by looking for the angle brackets. You’ll notice that 99% of the boilerplate is made up of HTML tags.
The first tag in the pair is what’s called the “opening tag” it’s always a bit of text, usually a single word, sandwiched between a “<” and a “>”. The second tag in the pair is called the closing or “ending tag” and is written sandwiched between a “</” and a “>”. You’ll notice that the tags are nearly identical with the exception that the closing tag uses a forward slash “/” (shift + ? ) after the < at the beginning of the tag. Remember to think of tag pairs like folders, holding and identifying common bits of information and providing hierarchical structure to the content.
Let’s take a look at the specific tag pairs that appear in our boilerplate and their functions:
- The
<html></html>pair indicate where the HTML code begins and ends in our file - The
<head></head>pair indicate a small section inside the HTML code for browser related information - The
<title></title>pair indicate what the title of the HTML page is - The
<body></body>tag pair indicates where actual page content starts and stops
Though we haven’t added much for content in our page yet, we have given our page a title. So our title folder holds the words “Semantic Text”. We learned in the last lesson that the title gets displayed in the browser chrome and is also used by search engines for searching and indexing pages.
We labeled our page title using the tag pair <title></title> which the browser understands to mean, “Here is what we want our page to be titled. Please put this is the appropriate spot in the browser window.” The browser displays it in the chrome (top part) and search engines are programmed to scan files looking for the title tags as it is a pretty good measure of page content and helps connect users to the information they are searching for.
You’ll notice too that our title tags live in between the head tags, or inside the “head folder” and all of the tags live in between the HTML tags or in the “html folder”. As we discussed earlier, the head folder holds all sorts of information that the browser can use to help display the page or make it more accessible. This can include language information, other files that need to be attached for the page to load, added keywords, etc.
Right now we only have a page title inside the head folder, but eventually we’ll add other items that all make sense to live inside the head folder. Since all of our tags are HTML tags, it makes perfect sense that all of them should live inside the HTML folder.
Many web designers use tabs and enters when they code to make it easy to see who lives inside of who. I’ve adjusted the boilerplate below to illustrate this.
<html>
	<head>
		<title>Semantic Text</title>
	</head>

	<body>


	</body>

</html>
You’ll see that the <html></html> tag pair are farthest to the left indicating that they are the folder that holds all other folders. Next you’ll see that the <head></head> pair and the <body></body> pair are tabbed in once. These are siblings both living side by side inside of the <html></html> tags. Lastly you’ll see the <title></title> tags, they are tabbed twice so visually we can easily tell that they live inside of the <head></head> tags. You can adjust your code to match mine.
Adding Content
So we’ve now covered in quite some detail both the concept and structure of HTML tags. Now that we have some of that out of way, we can begin the fun part, adding and marking up the content so we can publish it in the browser. As you’ve likely already guessed, we’ll use HTML tag pairs to mark up our content. The most common bit of content on any web page is paragraphs of text, so let’s begin there.
Adding a Paragraph
Let’s say we want to add the following paragraph to our page:
This is our first ever paragraph to be published on a web page. It is a very exciting thing to be able to share my content with the world. Here goes nothing!
The first thing we need to do is to make sure we are putting this content in the correct place in the HTML structure. We know that this belongs in the visual part of the page, so we also know that it must go after <body> tag and before </body> tag since the body tags are the gatekeepers for the page content.
The HTML tag that is used for paragraphs is a simple letter “p”, which stands for paragraph. The opening tag is written <p> and the closing tag is written </p>. So, just like we did with the page title, we need to wrap these tags around our content.
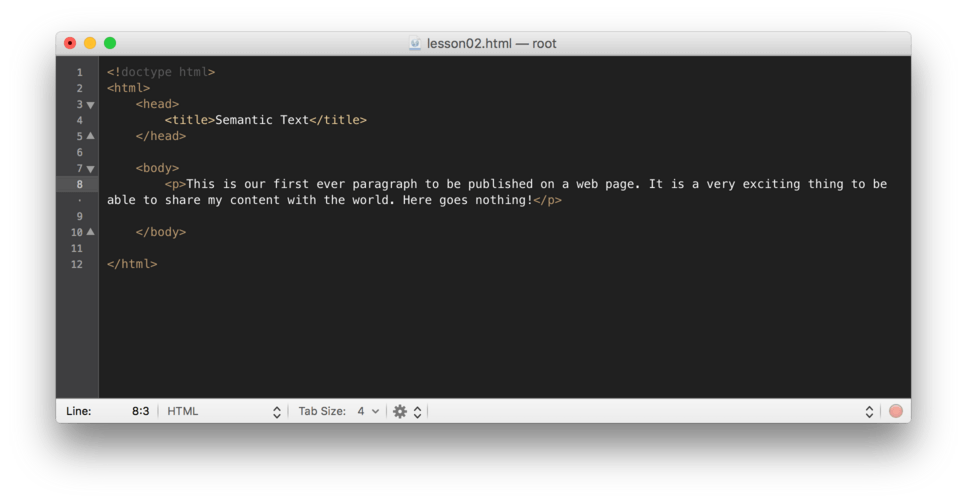
- Move your cursor to line 8
- Hit tab to leave space indicating that we are now inside the body folder.
- Type
<p>to indicate we are beginning a paragraph. - Copy and paste from above, or type in your paragraph.
- Then, type
</p>to indicate that is the end of your paragraph (fig 4).
Note: It’s important to note that you need to make sure that the whole paragraph is included between the tags and not individual lines. A paragraph by definition is a group of related statements, so it makes sense that the whole group of sentences get “marked up” as a paragraph.
Ok, let’s save this and preview it in the browser.
- Hit File > Save
- Navigate to your web browser.
- You’ll need to refresh the page to see your changes. In Safari or Chrome you can find this under View > Reload page or hit Command + r (fig. 5).
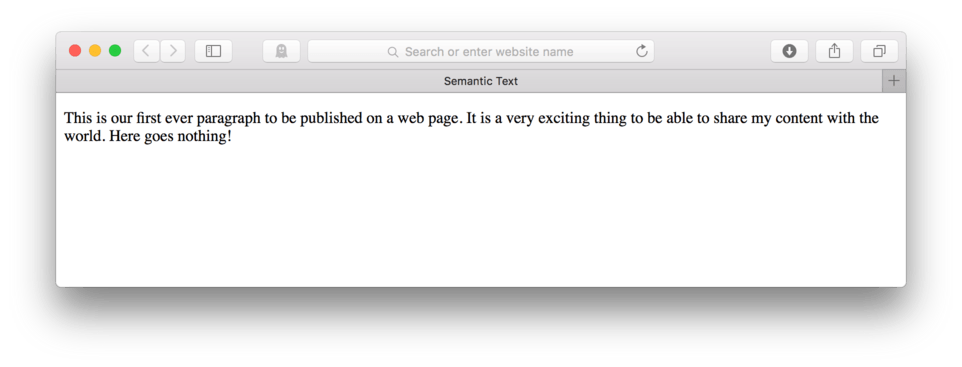
After you refreshed the page, you should see your paragraph appear in the body portion of the browser window.
Did it work? Awesome! Now, let’s do it again.
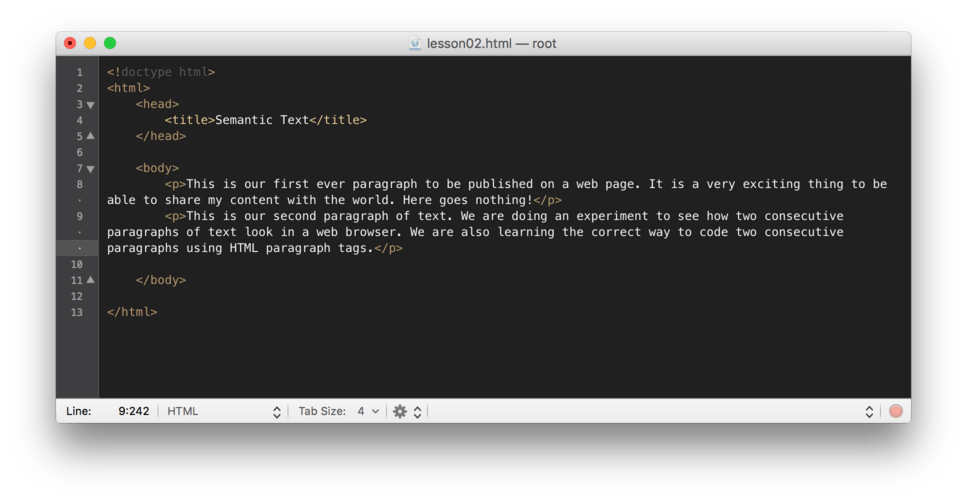
Let’s go ahead and add a second paragraph of text:
This is our second paragraph of text. We are doing an experiment to see how two consecutive paragraphs of text look in a web browser. We are also learning the correct way to code two consecutive paragraphs using HTML paragraph tags.
- Hit Enter to make sure you’re new paragraph gets entered on a new line.
- Now, Tab it in so it is neatly aligned with the previous paragraph.
- Type
<p> - Copy and paste from above, or type in your paragraph
- Type
</p>to end the paragraph - Now, make sure you Save your HTML file and then Refresh in your browser.
You can check your HTML against mine by comparing it to (fig. 6).
After you’ve refreshed your browser, your page should now look like (fig. 7).
Having two paragraphs helps us identify some of the things that the browser does when displaying paragraphs. You can see that any content “marked up” using a set of paragraph tags gets displayed using smallish black type and that a greater amount of space is put in between paragraphs than in between lines of the paragraph. The size of the type and the spacing helps our readers quickly identify where paragraphs start and stop and helps make reading the text on screen easier.
Adding Headings
Now that we’ve gotten paragraphs under control, let’s talk about headings. Headings are a group of textual content that provide hierarchy and structure to any written material. Headings have many purposes and layers. Headings are titles and sub-titles, they are section headings and sub-headings. Headings are super important, they are the bits of text that tell us what the content to follow will be all about.
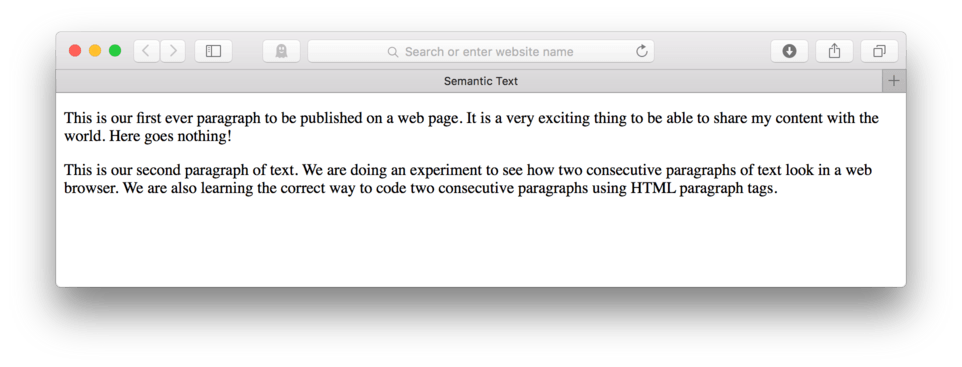
In web terms, there are generally only six available levels of headings. The first level is referred to as “Heading 1” and usually indicates the most important part of the page, usually the article title and is marked up in the HTML using the tags <h1> and </h1>. Let’s give it a try.
Since it is going to be the article title, this Heading 1 should come before the paragraphs. So, lets put in an additional enter after the opening body tag (<body>) to make room.
- On a new line right after the body tag, type:
<h1>This is my Heading 1</h1> - Now, Save the file
- Navigate to your browser and Refresh the page
Here’s how your HTML should look:
<!doctype html>
<html>
	<head>
			<title>Semantic Text</title>
	</head>

	<body>
		<h1>This is my Heading 1</h1>
		<p>This is our first ever paragraph to be published on a web page. It is a very exciting thing to be able to share my content with the world. Here goes nothing!</p>
		<p>This is our second paragraph of text. We are doing an experiment to see how to consecutive paragraphs of text look in a web browser. We are also learning the correct way to code two consecutive paragraphs using html paragraph tags.</p>

	</body>

</html>
and here’s how it should look in the browser. (fig. 8)
See how the Heading 1 gets displayed in the browser? The browser knows that it is the most important piece of information and responds by displaying it using a gigantic, black, bolded font. You’ll also notice that it puts a good amount of extra space below the heading to help separate it from the beginning of the paragraph below it.
More Headings
I mentioned that in web design, there are typically six levels of headings. We just learned the first: Heading 1. The others are: Heading 2, Heading 3, Heading 4, Heading 5, and of course, Heading 6. Each of these is written just like Heading 1 with the exception that their individual numbers replace the “1”: <h2> and </h2>, <h3> and </h3>, <h4> and </h4>, <h5> and </h5>, and <h6> with </h6>.
Let’s go ahead and add these below the paragraphs we coded earlier. You can copy and paste mine or type in your own.
<h2>This is my heading 2</h2>
<h3>This is my heading 3</h3>
<h4>This is my heading 4</h4>
<h5>This is my heading 5</h5>
<h6>This is my heading 6</h6>
- Save your file
- Refresh in your browser.
Here’s how your HTML should look:
<!doctype html>
<html>
	<head>
		<title>Semantic Text</title>
	</head>

	<body>
		<h1>This is my Heading 1</h1>
		<p>This is our first ever paragraph to be published on a web page. It is a very exciting thing to be able to share my content with the world. Here goes nothing!</p>
		<p>This is our second paragraph of text. We are doing an experiment to see how to consecutive paragraphs of text look in a web browser. We are also learning the correct way to code two consecutive paragraphs using html paragraph tags.</p>
		<h2>This is my heading 2</h2>
		<h3>This is my heading 3</h3>
		<h4>This is my heading 4</h4>
		<h5>This is my heading 5</h5>
		<h6>This is my heading 6</h6>

	</body>

</html>
and here’s how it should look in the browser. (fig. 9)
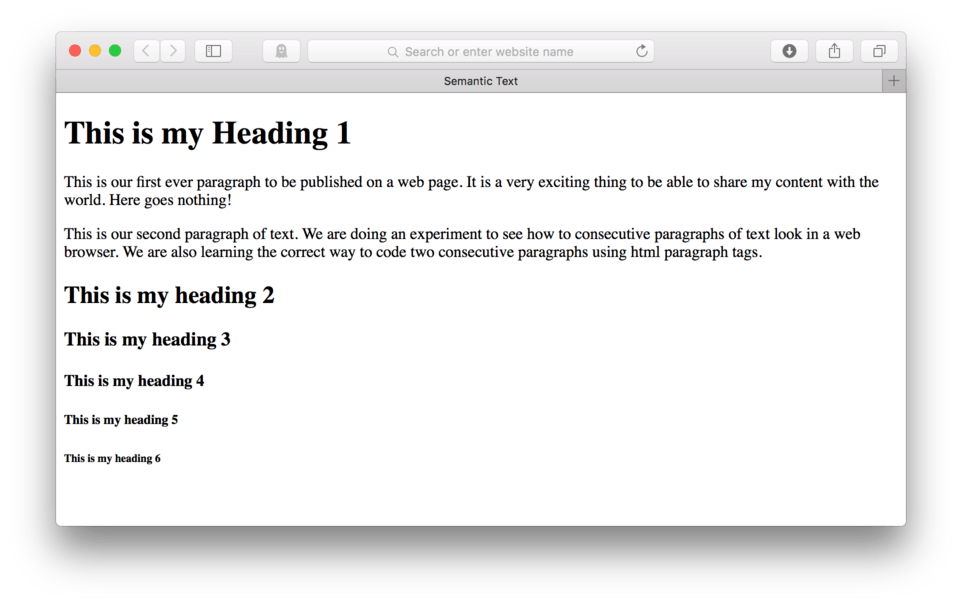
Hopefully, if your page is working correctly, yours will match mine and you’ll see that all headings have a few things in common. They are displayed by default to be black text with a bold font. You’ll also see that they all have lots of space built in below them to create separation between the headings and any content that might follow.
The Heading 1, commonly referred to as simply “h1” is displayed in the largest text, h2 is still quite large but considerably smaller, followed by the h3, and so on until the text actually gets smaller than the paragraph text.
Like the paragraph tag, the heading tags can, and should be used and reused on a page whenever it makes sense for the content. There is really only one exception to this rule, the h1. Though technically the browser will allow for more than one h1 tag and display all of them, it is best practice to only use this tag once. The thought being that there can only be one most important thing on any given page so choose wisely. It is also commonly believed that the h1 is indexed by search engines with higher priority since it should be a good representation of what the page is about.
For kicks, let’s try adding a Heading 7.
- One the next open line, type
<h7>This is my Heading 7</h7> - Save and then Refresh in your browser.
Here’s how your HTML should look:
<!doctype html>
<html>
	<head>
		<title>Semantic Text</title>
	</head>

	<body>
		<h1>This is my Heading 1</h1>
		<p>This is our first ever paragraph to be published on a web page. It is a very exciting thing to be able to share my content with the world. Here goes nothing!</p>
		<p>This is our second paragraph of text. We are doing an experiment to see how to consecutive paragraphs of text look in a web browser. We are also learning the correct way to code two consecutive paragraphs using html paragraph tags.</p>
		<h2>This is my heading 2</h2>
		<h3>This is my heading 3</h3>
		<h4>This is my heading 4</h4>
		<h5>This is my heading 5</h5>
		<h6>This is my heading 6</h6>
		<h7>This is my heading 7</h7>

	</body>

</html>
and here’s how it looks in the browser. (fig. 10)
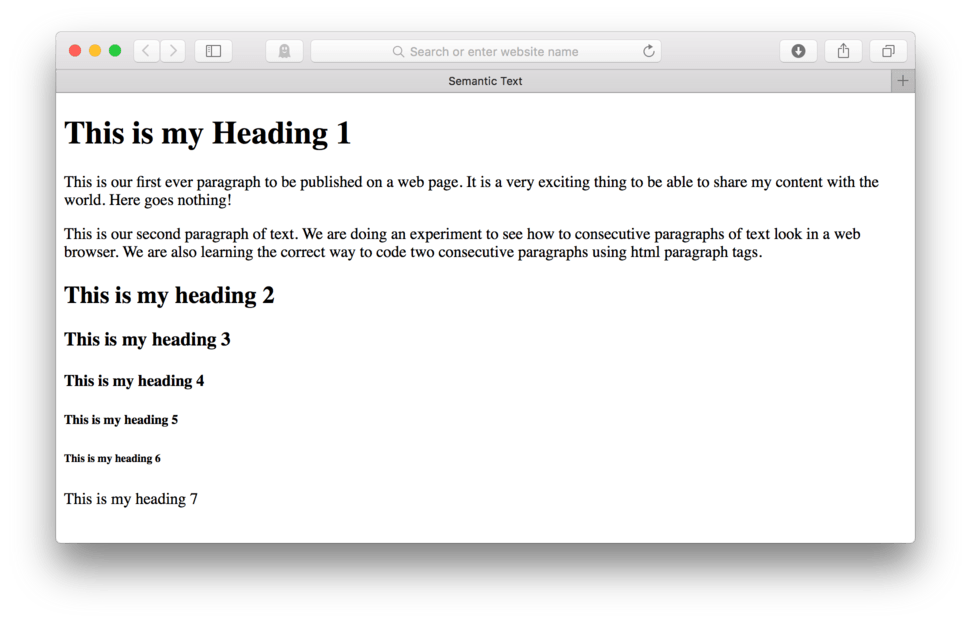
You’ll see that Heading 7 lacks the same kind of special formatting as the other headings. It actually looks a lot like the paragraphs do. This is because the browser doesn’t have any specifically significance tied to the concept of Heading 7. You’ll probably never need more than six levels of headings so maybe that is a good thing.
Emphasized and Strongly Emphasized Text
There are times where we need to make only a single word or bunch of words stand out inside of a larger string of words. This may be the case when we want to call out a very important word such as a keyword in a technical document, or a title of a book in a longer description of that book.
In cases where you need to call out only a portion of a statement, whether it be one single word or several, HTML gives use a set of tags we can use to semantically mark up those words. We have two basic choices, we can use a pair of <em></em> tags to markup emphasized text or a pair of <strong></strong> tags to point out strongly emphasized text.
These two tag sets are usually used by nesting them inside other tag pairs. They essentially are used to temporarily interrupt a bit of text to call out some portion of that text for additional styling. Let’s say we wanted to call out a keyword in a sentence that lived inside a set of <p></p> tags. We would write the code like this:
<p>In HTML we can call out <strong>strongly emphasized</strong> text by wrapping that text we want to emphasize in a set of special tags.</p>
Which would result in a paragraph that looks like (fig. 11).

In HTML we can call out strongly emphasized text by wrapping that text we want to emphasize in a set of special tags.
See how the words “strongly emphasized” look bold on your screen? That is usually how the browser renders any text that is wrapped inside of a set of <strong></strong> tags. Each browser is allowed its own interpretation of those tags, but the idea is that whatever text we want strongly emphasized we tell the browser using those tags so that it can render that text in a way that our user will be able to identify it as strongly emphasized.
The same is true for our emphasized text. We can wrap a bit of text in some <em></em> tags to create some emphasized text. For example if we wanted to emphasize a word that is part of a heading in our document we could write some code that looked like this:
<h1>Lesson Two - <em>HTML Semantic Text</em></h1>
Which would result in a h2 that looks like (fig. 12).

As you are probably noticing, the second part of the heading is now italic. Emphasized text typically results in italicized text, but again the browser can take some creative liberty in rendering this depending on the default programming of that particular browser. You might also take notice that you can use the <strong></strong> or <em></em> tags anywhere between the tags that you are nesting them in. In this example we end the code with </em></h1>. This simply says, end our emphasized text, then end our level one heading. It doesn’t matter that we don’t have any content that follows our emphasized text, but it does matter that we close our <em> before we close our parent tag, in this case our </h1> so the browser clearly understands what we want and no errors occur.
Later, we’ll be able to control the styling of that text in whatever way we like, but as we have come to learn, HTML and the browser do a pretty good job of creating structure and hierarchy in text even without any custom styling if we are careful about using semantic HTML markup for our content.
Lesson Conclusion
In this lesson, we learned about HTML tags and their structure. We discussed tabbing our code and using spaces to keep our code easy to understand what lives inside of what of our overall document. We learned about the primary tags available in HTML for formatting text content, the paragraph tag pair <p>and</p> and the set of heading tag pairs: <h2> and </h1>, <h1> and </h2>, <h3> and </h3>, <h4> and </h4>, <h5> and </h5>, and <h6> with </h6>.
With just the information we’ve accumulated in just these first two lessons, we have enough information to write the HTML to display an entire text article as a web page. In the next lesson, we’ll leap into other common content, specifically how to add images to our page.