File Management & HTML Boilerplate
Organization is Everything
Good web design is all about great organization. One of the biggest pitfalls beginning students often fall into is forgetting to put all the pieces in all the right places. This leads to broken links, missing images, and other common errors like the infamous “404: Page Not Found.” Like starting any project, whether cooking or painting the bathroom, the best chance of success starts with good, solid prep work. This is not only true for creating a web page, it is absolutely necessary for the web page to function.
Files and Folders
The best way to use this book is to follow the lessons in order. I’ll provide step-by-step instructions for creating a website from scratch. Each lesson will cover specific topics, and each lesson will build on material learned in the lesson(s) before. In many cases, I’ll provide files for you to download for use in your lessons (images, code snippets, example files, et cetera).
I suggest that, somewhere on your computer, you create a folder specifically for storing all the material from this book. I’m going to call mine “Bob,” but you can name yours whatever you like.
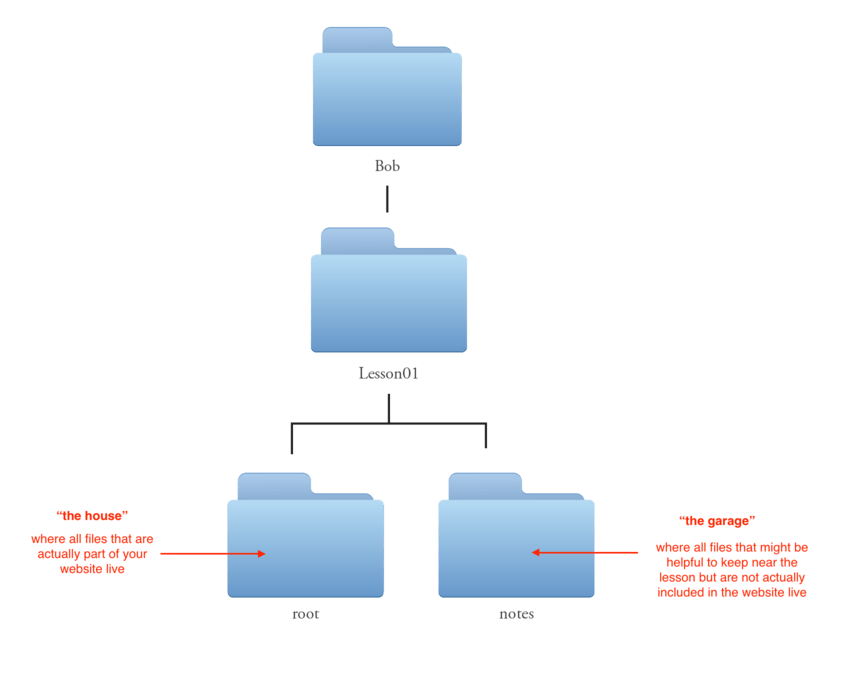
Each lesson will be independent, meaning that even though lessons will build on one another, incorporating skills and techniques acquired in previous lessons, each lesson will be its own self contained project. Repetition will help you remember the material better, and you’ll find that having independent lessons will serve as a great reference since you’ll be able to identify the primary topics covered when you need to go back to review them. Because of this, before starting each lesson, it is best to create a new folder, housed within your “Bob” folder, for that specific lesson. I will name my first folder “Lesson01.” (fig. 1)

Note: I didn’t type a space between “Lesson” and “01.” It’s good to get in the habit of leaving out any unnecessary characters, such as spaces, punctuation, or mathematical marks (fraction bars slashes, pluses, minuses, et cetera) because they can confuse the computer and create trouble for your site.
All Websites need a home
Each and every website, just like every person, needs a physical place to call home. It needs a place to live and to store its things, and it needs an address to reference when telling others where to find it when throwing a party.
For people, a home is a house or apartment. For a website, a home is a single dedicated computer folder. This home folder is often called the “root” folder or “home directory.” Though it’s not important that it be named in a certain way, I always name my home folder “root” so there isn’t ever any confusion.
The only items that ever belong inside the root folder are files that are part of the website itself. Any additional items, like reference images, design files, notes, and so on, should be stored elsewhere. Because of this, I usually make a second folder called “notes” for this specific purpose. You can think of this like the garage–a convenient place to store and organize the things that don’t belong in the house and are nice to have but are not actually necessary for living. (fig. 2)
Allow me to carry this home metaphor a little further. The root folder is sacred. Like a house that holds all of your essential items for daily life, the root folder holds all the things that a website needs. Also like a house, it needs individual rooms to store items that are meant for certain tasks.
We call these individual rooms subfolders, and each one we create will serve a specific purpose for our site and will have a specific name to identify it. We are going to keep it nice and simple for now, but I will come back to this idea a little later.
Starting to Write the Code
All websites are made up of the same two basic component parts: the content (text and images) and the presentation (the design and the layout). Additionally, some websites incorporate a third component, often thought of as a layer, the interactivity (animation effects, the ability to accept data entered by the user, ability to respond to user requests, et cetera).
The purpose of this book is to learn the basics of building a website, so in this particular book we will be primarily focused on the two main components, the content and the presentation, though I will bring up bits of the third (the interactivity) as a teaser later in this book for those of you who find yourself thirsty for more.
It’s All About the Content
The purpose of a website, or any design, is to communicate something. Whether it be an article about brown bears, a collection of butterfly images, or a personal blog—without content, there is no website. The text, images, videos, and other content that make up the website are the site’s most important part, and are arguably the only truly necessary part of any website.
The internet was developed from a need to quickly publish and distribute documents (largely scientific in the beginning) , primarily to scientists for research purposes. It was created so that these documents could be viewed from literally anywhere, by anyone, essentially accelerating the rapid scientific research developments we enjoy today. In order to achieve this, a special language needed to be invented for online publishing. This language is called HTML, which stands for Hypertext Markup Language.
HTML Basics
HTML is essentially a set of structured units that label content in a way that the browser (think Internet Explorer, Google Chrome, Firefox or Safari) understands. The browser reads your content looking for these labels. Each labeled piece of content gets displayed a certain way on the screen based on its particular label. For example, “heading” is a label that all browsers understand. All content labeled “heading” will be displayed in large bold text to set it apart from other content. “Paragraph” is also a label that browsers understand. Any content labeled as “paragraph” will be displayed in smallish, easy-to-read type.
OK, so written examples are great, but I believe that the best way to understand something is through doing, so let’s turn our attention to actually making a website.
In order to write code, you’ll need special software specifically designed for coding websites. There are many great options out there but for this book, I’m going to be using TextMate. This is an open source program for Mac, and it can be downloaded and installed here: TextMate 2.0 beta.
For anyone using Windows, I recommend using Notepad++, a very similar open source program made just for Windows computers. For complete installation instructions and configuration, I’ve written a detailed guide available here.
Note: For those of you who subscribe to Adobe’s Creative Cloud, you may want to use Dreamweaver, and that’s cool, too. The examples here will be shown using TextMate, but should be easy to follow using the Dreamweaver environment. This is especially true if you strip Dreamweaver down to its bare essentials.
- Launch TextMate
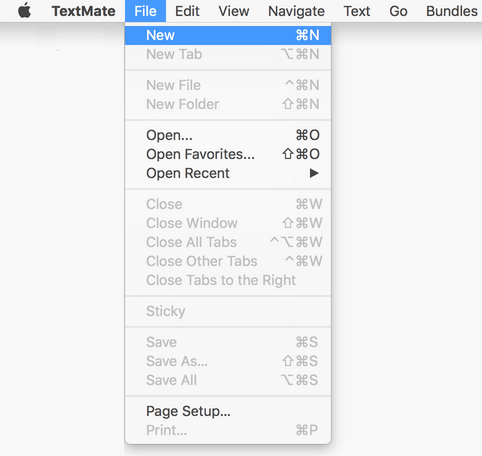
- From the menu on the top left of your screen Click File > New (fig. 3).
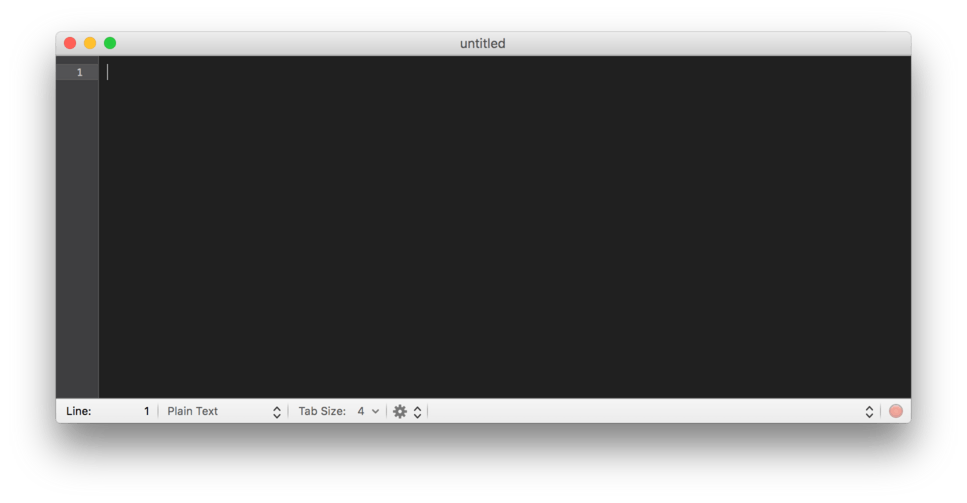
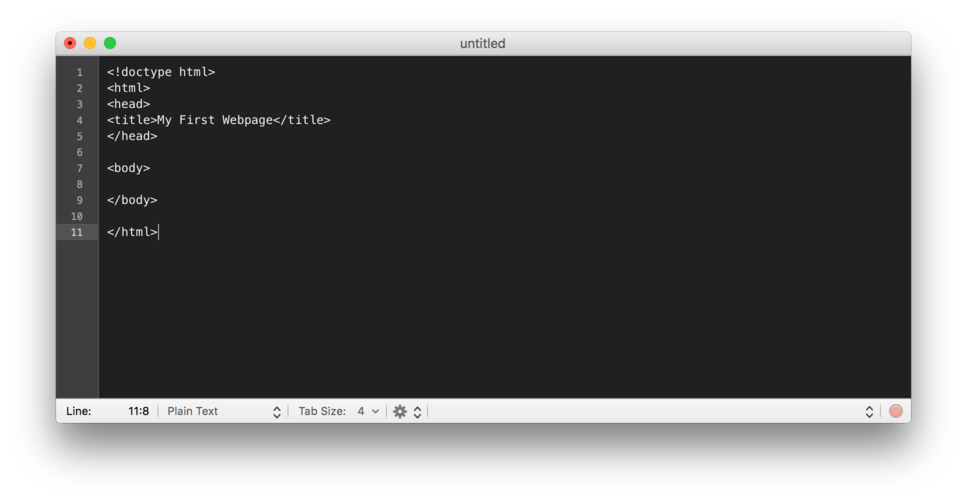
This will launch a simple window with a small number “1” in the top left corner (fig. 4). If you move your mouse into the window and click, you should see a blinking cursor much like you would see in any word processing software.
Next, type a few characters just to make sure everything is in order. Did it work? If so, good! You’re already off and running! Anyone who has used a word processor to write a document has the technical software skills use a code editor to write (or code) a website. There are many similarities, as I’m sure you’ll notice along the way.
The Boilerplate
Each and every website essentially begins with a few lines of nearly-identical code. As I mentioned earlier in this lesson, special software called a browser (Chrome, Firefox, Safari, Internet Explorer, et cetera) is responsible for translating our code into a website viewable on screen. Browsers have the ability to read all sorts of documents, and different types of documents are processed and displayed differently on the screen. Because of this, it’s important that the first lines of our document tell the browser what to expect from our document.
In case you didn’t already, delete any text that might be in your code editing window. We’ll want to start with a totally blank slate. The first thing we need to do is tell the browser is what type of document we are creating.
Since we are working on building a webpage, and we already know that website content is handled using HTML code, we will need to tell the browser that our document type is going to be an HTML document.
- In the TextMate window, make sure your blinking cursor is on line 1 and no other text is present.
- Then, type:
<!doctype html>
Note: In case you aren’t familiar with the special characters used above, those guys are called angle brackets. They are typed by holding the shift key and pressing “,” (comma) for the left one and holding the shift key and pressing “.” (period) for the right one.
This will always be the very first line of any HTML document. It establishes the document as HTML so that the lines of code to follow can be understood and displayed correctly on the screen by the browser.
Next, we need to let the browser know exactly where in our document the HTML code begins. This is important because it can often be the case that other non-HTML code and extra information gets included at the beginning of a document.
- Hit Enter (or return) to move to line 2.
- On this line type:
<html>
This line lets the browser know that the HTML coding begins here. Any code that follows this line is assumed to be HTML code, and the browser will do its best to display it on screen as such.
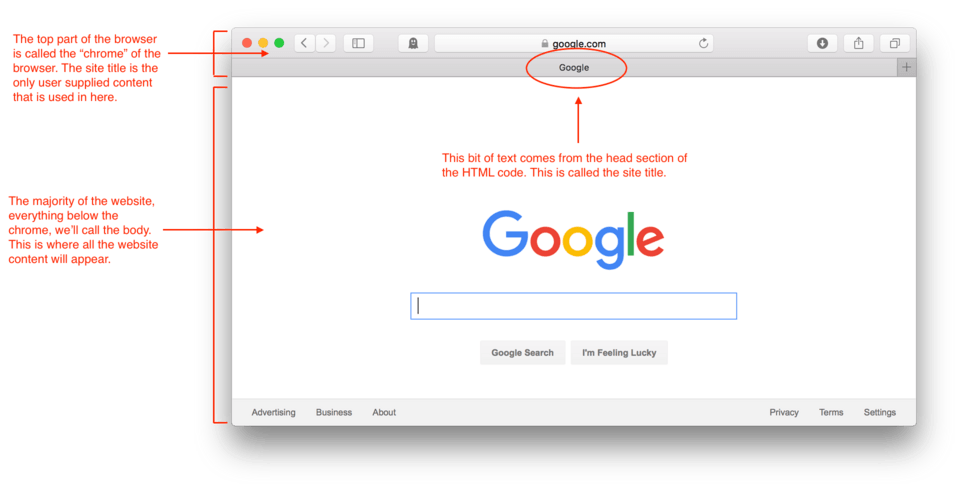
The next bit of code gives the browser information about the website and is called the “head” section. It’s the area of code that provides information about other files that might be linked or keywords for searches. Most importantly, it is the area where you tell the browser what text to display when a user bookmarks the page. This is also the text that will appear in the top bar or tab of the browser when your page is on the screen. This is called the site “title” and serves a very important role. It not only helps your eventual site users to orient themselves, but it also becomes a high level set of search terms for any search engine.
- On line 3, type:
<head>
Like line 2, this line tells the browser that something is beginning. In this case, it indicates that the next few lines of code belong to the head section of the site. The head section provides tons of information that is useful to the browser and to search engines, but this isn’t often information that a user will see as a main part of your site. Essentially, this is good and necessary information, but it is not part of your site content.
Inside the head section, we want to let the browser know what our webpage is called. This is referred to as the “title” and gets displayed at the top center of the browser window and also in the tab when multiple tabs are open in a browser. It helps our user identify what our page is about and helps search engines understand what information will be found in our page.
On line 4, type:
<title>My First Webpage</title>
This line is quite a bit more complex than the last few we wrote. That is because it includes three separate parts: <title>, which lets the browser know that this is the beginning of the title of the page, “My First Webpage,” which tells the browser what I want my page to be named (the actual content I want displayed), and </title> which lets the browser know that the content to be included in the page title is completed.
There will typically be a lot more information included in a head section, but we want to start with just the bare essentials, so at this point, we want to let the browser know that we are done coding our head section.
On line 5, type:
</head>
This may look a little familiar. See how it resembles the end of the last line we typed? Just like when we had to indicate when we were finished with our page title we had to say </title>, when we want to say we are finished with our head section we say </head>. This is essentially the system that all of HTML runs on: it indicates where a specific element starts, what that specific element is, and where that specific element ends.
Now that we’ve finished with the head section, we want to tell the browser that we’ll begin a brand new section. This new section will be the webpage itself. In other words, this will be the content that gets displayed in the body of the browser window.
To keep our code easy to read, let’s hit enter twice, putting our cursor on line 7. Its common practice to leave empty lines to create visual breaks in code between, independent chunks of related information.
On line 7, type:
<body>
This indicates to the browser that we are about to start coding the actual page content of our site. Everything up until this point, with exception of the site title, happens behind the scenes and isn’t visible to viewers of your page. The body is the large main part of the browser containing all of the content for the site. This is where your text, images, videos, and so on will be coded in for your end user to see. (fig 5)
We have now written all the necessary code a browser needs to be prepared for accepting our site content. What this means is that we’ll soon begin putting our content in that we want displayed on the page.
Before we do that, however, it’s best practice to make sure that you end everything you begin. This is a concept I’m going to explain in some detail a little later, but for now I want to focus on the bare minimum code for a website to display.
What I’m getting at is that we have coded a number of beginning commands, called opening tags to tell the browser to read a new type of information: <html>, <head>, <title>, and <body>. Each of these opening tags also needs an end to tell the browser that there will not be any more of this type of information. We did provide an end for two of these; we wrote a </title> after we had typed in “My First Webpage” (the text to be displayed in bookmarks and in the browser chrome). We also typed </head> to let the browser know that the information to be included in the head information was finished. This leaves us with two tags still open, <html> and <body>.
We know that more code will follow our <body>, but we also know that eventually our page content will be completed and we will need to tell the browser that the body content is finished. So, best practice is to make sure that we close it up right away so that later we don’t have to worry about leaving something unfinished. To make it easy for us to see when reading through our our code later, we will also create some placeholder space for our content. We don’t need to worry about knowing exactly how many lines we’ll need for our content as we can always add additional space later, but it’s nice to have a bit of blank space to give us a visual cue in our code so we can quickly find the spot when we need it.
- Hit Enter three times
- On line 10, type:
</body>
Now we have told the browser that all body content is finished. We can enter as much code as we want before this command, but we are safe in knowing that it has been indicated where the body content stops.
We still have one last closing command to make. We need to let the browser know that all of the HTML coding on the page is complete. Here, best practice is to leave one open line of space to make it easy for us to see when we are scanning through our code.
- Hit Enter twice.
- On line 12, type:
</html>
Ending the HTML is the last line of code on our webpage. It tells the browser we are done writing HTML code and allows the browser to understand that the page is complete. We have now made sure that we have beginning and ending places for each of the sections of our website, indicated with the opening and closing code for each.
We’ve just walked through all of the code that every website needs to have at a bare minimum. This bit of code is referred to as the boilerplate and will always be the basic skeleton setup of any page we create in the future.
Let’s take a look at our TextMate window and double-check our work (fig. 6).
Note: There is one exception you may have noticed to the opening and closing rule. Our first line of code,
<!doctype html>is all alone. It has no closer, and that is OK. This little piece of code needs to be all on its own.
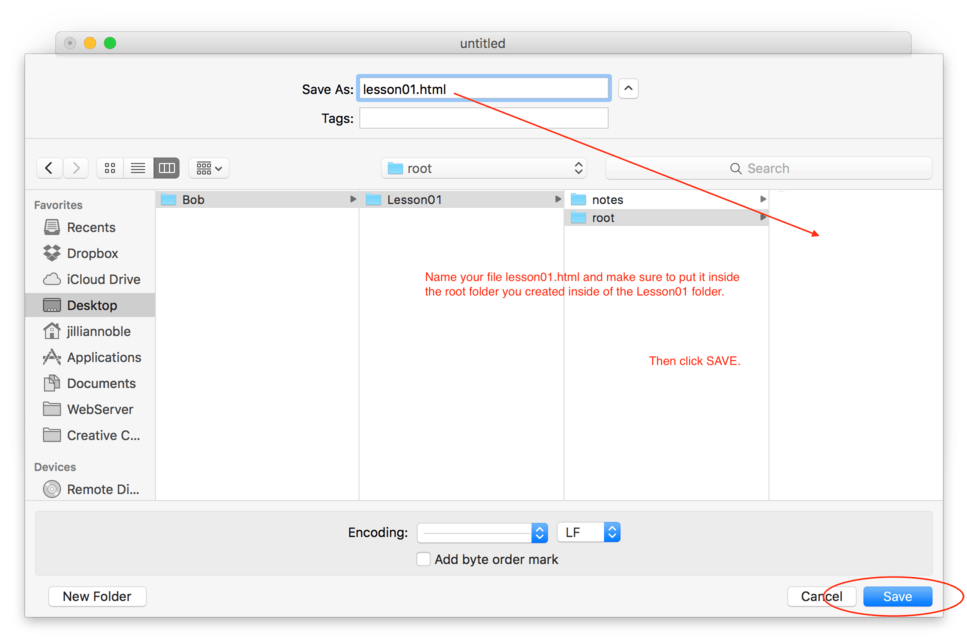
The last step in this lesson is to save our work and test our site in a browser. It’s important that we save our file in the correct location and with the correct file extension (what comes after the “.” in any file). We need to make sure that this file is saved inside our “root” folder for this lesson and has the file extension .html.
- From the TextMate menu select File > Save As
- Name the file lesson01.html and navigate to the root folder you created for Lesson01.
- Click Save (fig. 7).
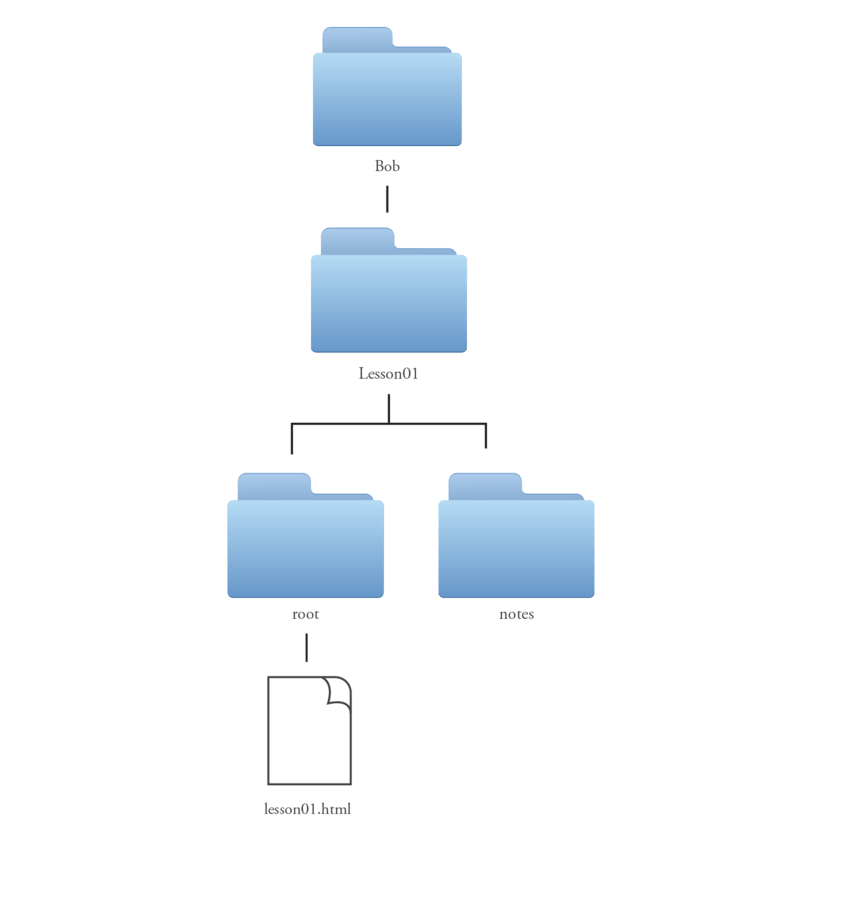
Your folder structure should look like (fig. 8).
Note: It’s extremely important that this file gets saved inside the root folder. If you are having trouble navigating to that folder, you may need to click the small button to the right of the “Save As” text field. It has a small arrow icon. Clicking this icon drops down the larger navigation window and allows more for more control.
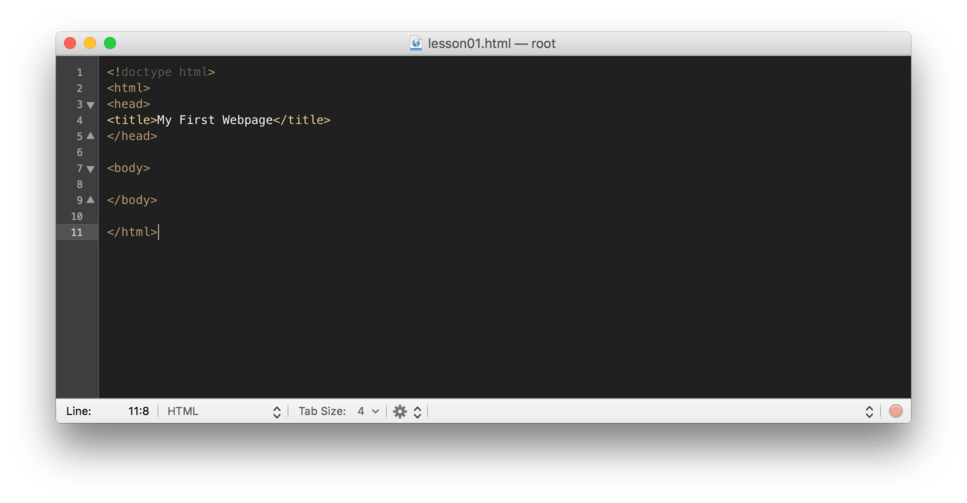
Once you click Save, you’ll notice a few changes to your TextMate window. First, you’ll likely notice that your type has changed colors. Secondly, you’ll notice that instead of it saying “untitled” at the top of the window, it now reads “lesson01.html – root.” Both of these are good things because they show that we have saved the file correctly (fig. 9).
Now we are ready to see how our page looks when we open it in a browser window. You can use the browser of your choice. My examples will use Safari.
- Launch Safari (or browser of your choice)
- File > Open File > navigate to the file you just saved, lesson01.html
- Click Open
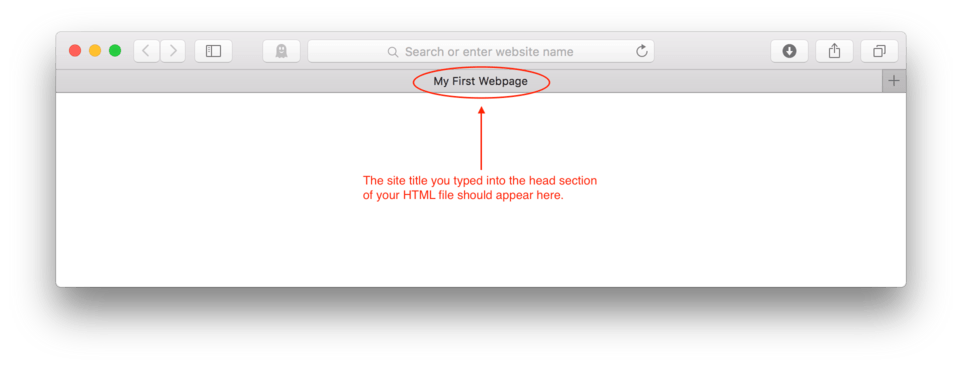
You should now have a new Safari window open. You will know for sure this is your website when you take a look at the site title in the browser chrome or tab. You should see “My First Webpage” appear in at least one of those places (fig. 10).
Lesson Conclusion
Congratulations! You’ve just created your very first webpage!
I know it doesn’t look like much quite yet, but it is just the beginning. You now know the initial steps that every web designer has to take just to get a single blank webpage to display in a browser. You’ve already learned the boilerplate, so you are well on your way. In the next lesson, we’ll get to work on displaying some real page content.